
Workshop at the Ranch – October 2012 – Lightpainting with “Soft Focus” Technique
 Hi and welcome to this edition of Workshop at the Ranch. This has been a year of learning for me. Yes, that’s right, “learning.” Just because I am a professional photographer doesn’t mean that I know it all. I need and want to learn new techniques that move my photography in an ever-forward direction. So, with learning something new foremost in my mind, let me share with you one of the most exciting techniques that I have been using this year… Lightpainting with “Soft Focus.”
First of all, if you are not familiar with Lightpainting this article will only make sense for you if read my WATR 8 part series on Lightpainting beginning with the 2011 WATR article called “Lightpainting…Part 1 “The Basics.” This series of 8 articles will give you the foundation and principles of how to Lightpaint. You might also watch my Lightpainting teaching videos on KelbyOne. You would need to join the KelbyOne program to do so, but all the training videos on KelbyOne are worth it…here is a link. www.kelbyone.com or just “click” the KelbyOne icon on the left side of my website pages.
|
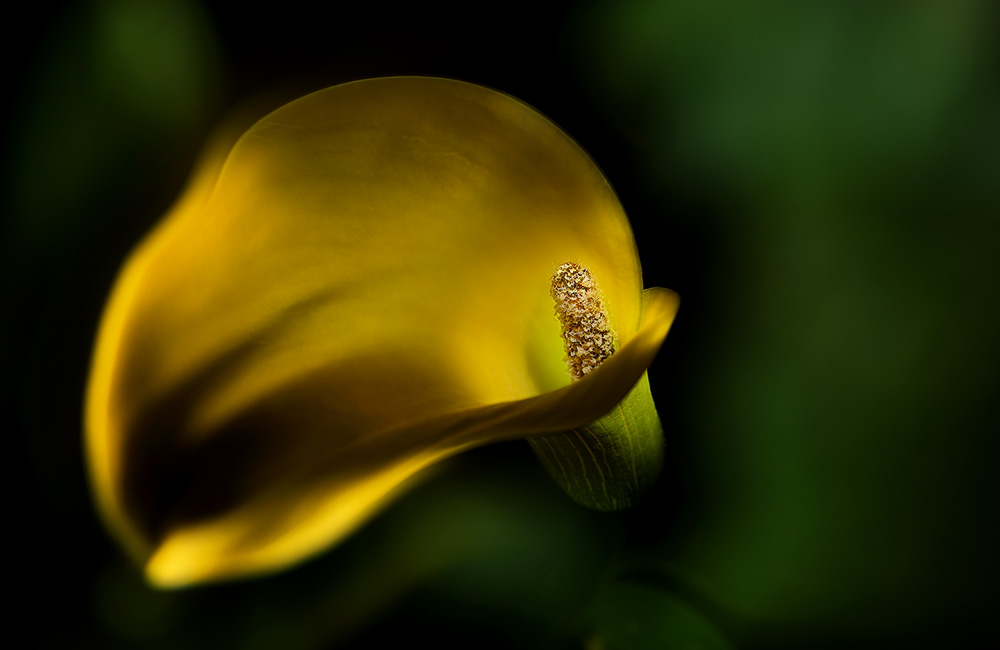
It is my recommendation that you first make a Table-Top size Lightpainting that is simple and straight forward. I would advise you not to use the “Soft Focus” technique until you are comfortable with basic Lightpainting. Here is a Yellow Lily that has been Lightpainted. I used a Manual exposure of ISO 200, 30 seconds exposure time, and f5.6 aperture setting. The f5.6 aperture setting creates a “short depth of field” which allows the green leaves to slightly soften in the background. It is lovely just as it is and makes a fine Lightpainting portrait of a flower. |
|
Image #1B Yellow Lily with “Soft Focus” …This image was made using the same exposure settings and camera data, but it has a very different and unique look. In this image the background is super soft and a portion of the yellow petal is also softened, but the stigmas is perfectly sharp. The image takes on a more dreamy appearance and the viewer’s eye is drawn to the stigma of the flower for two reasons. 1. The concentration of Lightpainting is highlighting the stigma. 2. The sharpness or perfect focus of the stigma in contrast with the “Soft Focus” of the rest of the image. These two key elements of photography, Light and Focus, help draw the viewer to whatever you want them to see.
|
| NOTE: How do I find the focus ring in the dark? I have placed some florescent colored tape on the focus ring of the lenses that I Lightpaint with. This makes it easier for me to see the focus ring and gently Pull or Push focus (“Soft Focus”) the lens during the long exposure time.
The Yellow Lily is a perfect size subject to begin learning this technique. Nikon D800, ISO200, 30 seconds at f5.6, Nikon 28-300mm zoom lens with Kenko 36mm close-up Extension Tube, WB 8330K, Stylus penlight, SanDisk Extreme Pro 32G Flash Card. NOTE: Why such a warm White Balance setting using the Kelvin scale? The standard LED light is a cool color of white that tends to make skin tones slightly blue (cool) in color. By using a WB of 8,000K (or slightly higher) the skin tone becomes a more natural color. By increasing the Kelvin up to 10,000K a warmer (almost sunset looking) skin tone can be achieved. |
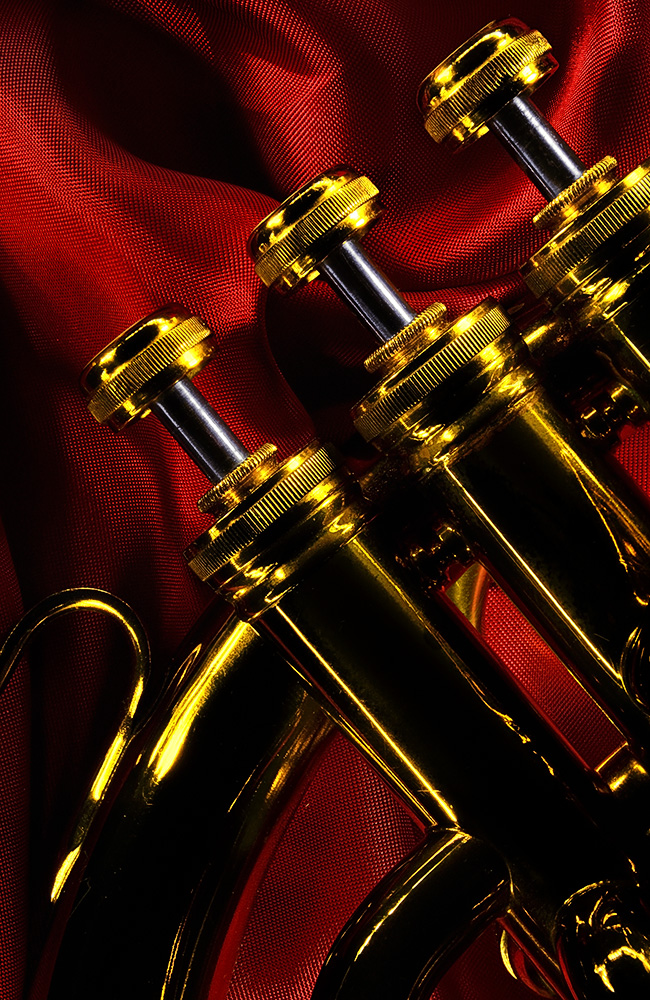 Image #2A French Horn … I posted this Lightpainting of a French Horn in my June WATR article. It is a Lightpainting made with my Nikon D800, ISO200, 30 seconds at f36, Nikon 28-300mm zoom, WB 10,000K, Bolt 2L flashlight by Inova www.inovalight.com Manfrotto Tripod and 410 Geared Head, SanDisk Extreme Pro 32G Flash Card. Every detail of this image is in focus and sharp as a tack. But the next image is the “Soft Focus” technique version. Image #2A French Horn … I posted this Lightpainting of a French Horn in my June WATR article. It is a Lightpainting made with my Nikon D800, ISO200, 30 seconds at f36, Nikon 28-300mm zoom, WB 10,000K, Bolt 2L flashlight by Inova www.inovalight.com Manfrotto Tripod and 410 Geared Head, SanDisk Extreme Pro 32G Flash Card. Every detail of this image is in focus and sharp as a tack. But the next image is the “Soft Focus” technique version. |
|
Once the valves are Lightpainted in focus I turn off the Bolt 2L flashlight and take 5 seconds to “Soft Focus” the lens to infinity. This is commonly called “Push Focus.” This allows me 19 seconds of exposure time to Lightpaint the remainder of the French Horn out of focus. All the same camera data is the same with this “Soft Focus” image as with the original Image #2A French Horn. |
|
NOTE: I have discovered that an aperture setting of f5.6 or f8 offer a broad enough depth of field for the sharp areas, but also allow a terrific softening effect when the focus ring is either pushed or pulled. There is also a difference in how the softening looks depending on how much you push or pull and depending on weather you “Push” or “Pull” the focus. Experimentation is the best way to discover what looks best for you.
|
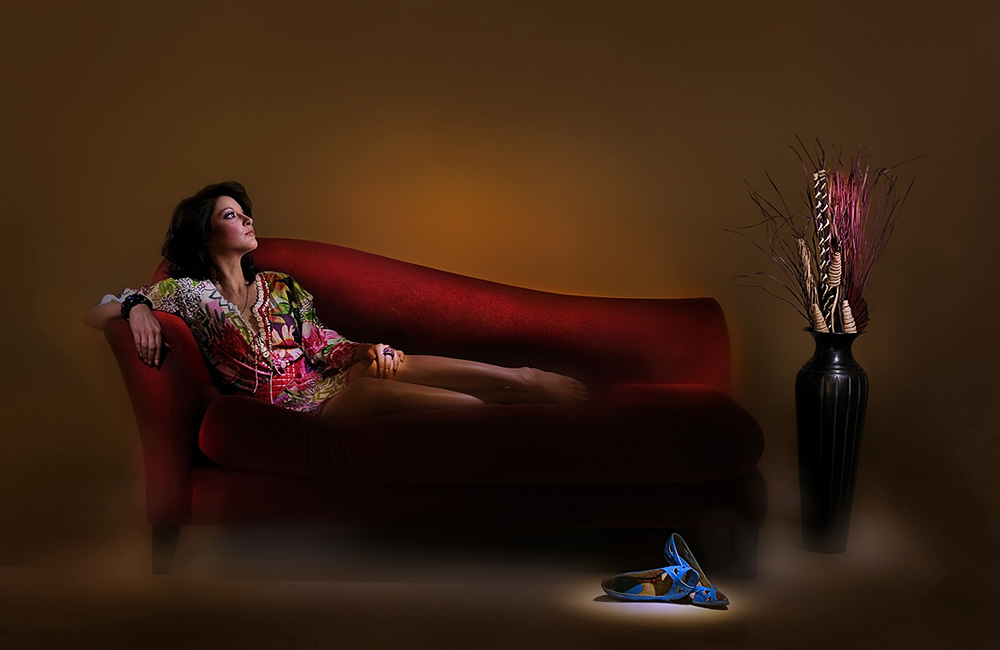
 Image #3A Chaise Lounging … This Lightpainting was made as an example in my KelbyOne video “Lightpainting …Illuminating Models” www.kelbytraining.com The KelbyOne video was filmed prior to the release of the D800 and so I used my Nikon D3s, ISO250, 30 seconds at f5.6, Nikon 24-70mm lens, WB 8330K, Manfrotto Tripod and Ball Head, Bolt 2L flashlight (with home made Gaffer tape snoot), SanDisk Extreme Pro Flash Card.
There are several parts to the “Lightpainting puzzle” that need to be illuminated in this scene…her face, hair, torso, hand and ring, legs, chaise lounge, shoes, floor vase with decorative plants, and background wall. At an aperture of f5.6 everything in the scene is in focus with the exception of the background wall that is 8 feet behind the chaise lounge. |
|
Image #3B Chaise Lounging with “Soft Focus” … All the exposure settings and camera data remain the same for this image. The difference is “Soft Focus.” I Lightpainted her face (2 seconds), hair (2 seconds), upper torso (3 seconds), hand and ring (1 second), top of the chaise lounge (4 seconds), the shoes (2 seconds) and decorative plants in the floor vase (2 seconds) all in focus. Then I take 5 seconds to “Soft Focus” (pull focus) the lens and Lightpaint the floor (2 seconds), front of the chaise lounge (2 seconds), and background wall (5 seconds). This totals 30 seconds of exposure time. I could have used a longer exposure time of 1 minute but usually a model moves during such a long time, resulting in some ghosting. All this is explained on the KelbyOne video. I try not to re-Lightpaint the subject’s face that was Lightpainted in focus at the beginning of the exposure. The result would be kind of sharp but kind of blurry facial features. Other areas of a scene can have a combination of sharp and then re-Lightpainted soft, as you will see in the next image. Experimentation is your best friend. NOTE: You might ask, why not use a blur tool in Photoshop? Well, it just doesn’t have the same dream like quality that doing it via the “Soft Focus” technique creates. I like making images in the camera rather than post production. |
|
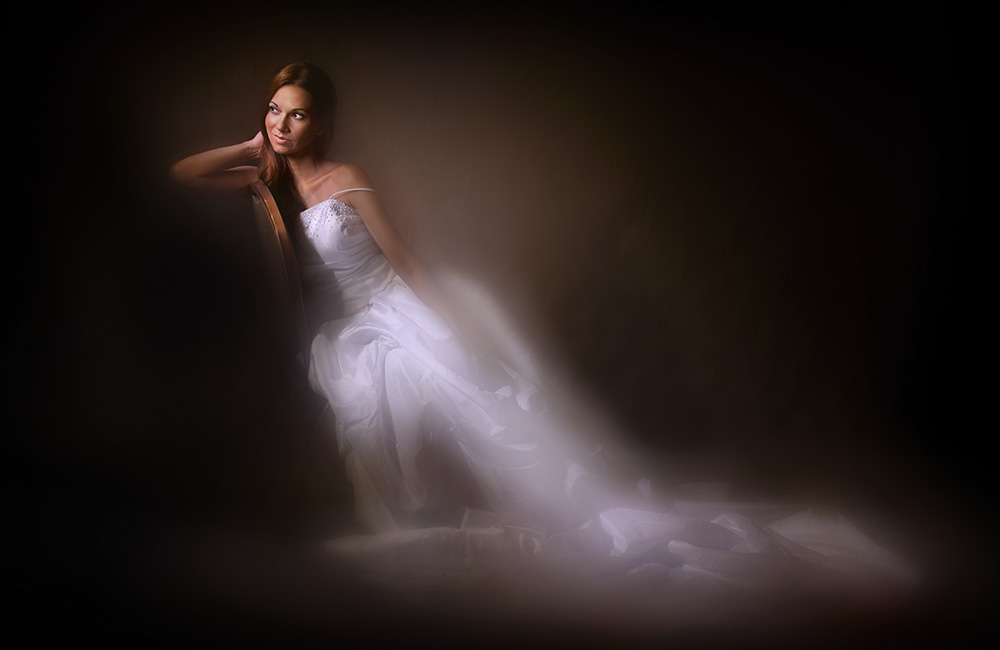
Image #4 Bridal Glance with “Soft Focus” … This final image was made just a few days before writing this article. I wanted to portray this young lady in an angelic, heavenly light. With the lens in perfect focus on her face I applied Lightpainting to her face (2 seconds), upper torso (2 seconds), and the dress (2 seconds). Then I “Soft Focused” (pulled) the lens about ½ way to the minimum focus distance (7 seconds). I then re-Lightpainted the dress from the waist down to the floor (2 seconds). Then I pulled the focus all the way to the minimum focal setting (7 seconds) and Lightpainted the background (5 seconds). I love the results. Her face, shoulders and upper torso is perfectly sharp. There is detail of the folds in her wedding dress, yet the ½ pull “Soft Focus” and then re-application of Lightpainting on the dress creates the angelic glow. Finally, the background is only 3 feet behind her yet, by re-pulling the focus all the way to the minimum focus, the background devolves away. Nikon D800, ISO400, 30 seconds at f5.6, WB 8330K, Stylus penlight by Streamlight, Manfroto Tripod with 410 Geared head, SanDisk Extreme Pro 32G Flash Card.
|


Well, I hope you all have enjoyed the article teaching a very stylized “Soft Focus” technique while Lightpainting. This month’s article only touches the tip of this most exciting way of making photographic imagery. I encourage you all to experiment and step out of the “usual” and into the “Unique” with Lightpainting and “Soft Focus” technique.
Here are links to the light sources I use to Lightpaint Table-Top subjects and models.
Stylus penlight by Streamlight: www.streamlight.com
Inova Bolt 2L LED Flashlight: www.inovalight.com
See you next time here on Workshop at the Ranch. Adios. Dave
