2018 April WATR… PSW 2018 Orlando Preview
Hi and welcome to the April 2018 edition of Workshop at the Ranch – my Instructional BLOG. Photoshop World 2018 Orlando is fast approaching starting on May 30 – June 2. Here is a preview/workbook of what I will be teaching. Register and come join the learning and good times at PSW 2018. https://photoshopworld.com/
![]()
PSW 2018 … Wednesday May 30 at 12:00 – 6:00PM
LIGHTPAINTING Custom Cars: Pre-Con workshop
All my Lightpaintings are made in-camera as one single RAW file image. Its fine if you would rather make layers of Lightpainting and “assemble” your Lightpaintings in Photoshop, but I like to make a single “photograph” … the choice is yours.
My LED flashlight for Car size Lightpaintings:
I use the ProTac 2AA LED Flashlight made by Streamlight, but any LED flashlight with 150 Lumens will do nicely for car size Lightpaintings.
NOTE: The ProTac 2AA LED flashlight can usually be ordered by Batteries Plus. If Batteries Plus is not in your area, LOOK at the bottom Right-hand corner of the Streamlight website page: http://www.streamlight.com/en-us/product/product.html?pid=201 …you will see a box: FIND a DEALER. Type in your zip code, click SEARCH, and a list of Streamlight product dealers will come up.![]()
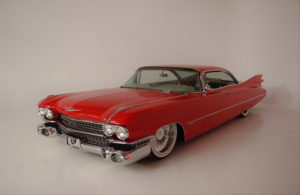
Image #1 – Step 1. Red Caddy … Nikon D5 with available ambient studio fluorescent lighting.
First we backed the 1964 Red Cadillac into the studio so that it set diagonally into the corner about 6 feet from the Cyc Wall … “Cyc” is an abbreviated term for cyclorama. Webster defines a cyclorama as “a curved wall used as a background of a stage set to suggest unlimited space or an infinity floor to wall appearance.” ![]()
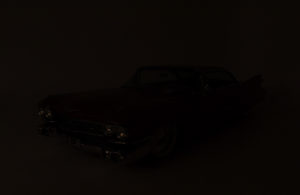
Image #2 – Step 2. Red Caddy … Nikon D5, ISO500, 30 seconds at f8, NIKKOR 24-70mm f2.8 lens (at 35mm) WB 10,000K.
My Nikon D5 camera is mounted on a tripod and I use a Manual Exposure for all my Lightpaintings. I begin my Lightpaintings by making a dark “BLANK” image with NO Lightpainting. I usually begin with my standard “Baseline Exposure” of ISO500, 30 seconds at f8. Note the WB 10,000K which helps make a standard cool/white LED flashlight turn a pleasing warm tone of light.
In this image the “Baseline Exposure” is very dark, but there is a tiny bit of ambient light that is leaking in through the top of the studio garage door. No worries, it’s “dark enough” for Lightpainting and the dim ambient allows me to see where I’m working during a 30 seconds exposure time.
NOTE: If the ambient had been much brighter I would have adjusted the exposure by either lowering the ISO or increasing my aperture …
NOTE: I sometimes use a digital cable release and have a longer exposure time and adjust the ISO and aperture accordingly, but for teaching purposes I will stay with a 30 seconds exposure time as every camera is capable of doing so.![]()
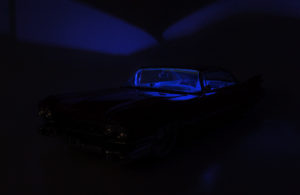 Image #3 – Step 3. With my exposure set at ISO500, 30 seconds at f8 I place a Blue LED light on the front seat of the car. I use an assortment of colored LED light made by LazerBrite www.lazerbrite.com These little colored LED’s are perfect for illuminating the interior of cars, engine area, or underneath the car as well.
The Blue LED is turned “ON” for the entire exposure time of 30 seconds and it illuminates the interior of the Caddy, but also castes a nice design on the Cyc Wall … a great bonus in my opinion.
Now the FUN part … Lightpainting the 1964 Red Cadillac:![]()
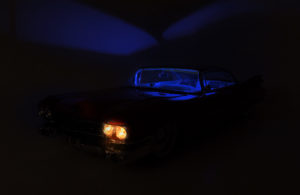 Image #4 – Step 4. With my Exposure at ISO500, 30 seconds at f8 and my Blue LED placed on the front seat, I am now ready to begin making Lightpaintings of this classic 1964 Red Cadillac.
Using the ProTac 2AA LED flashlight I simply stand in front of the car and Lightpaint the left Headlight for about 1 second of light … the distance from LED to Headlight is about 2 feet. ![]()
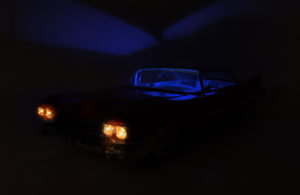 Image #5 – Step 5. Then I moved to the right Headlight and did exactly the same application of light … about 1 second of light. This illumination of the Headlights brings “Life” to the car as if it were turned on.
![]()
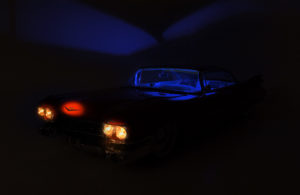 Image #6 – Step 6. Now I apply a similar application of Lightpainting to the Cadillac hood ornament, from about 2 feet away and for about 2 seconds.
![]()
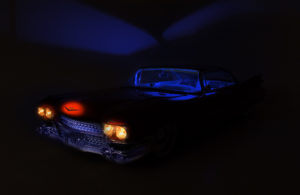 Image #7 – Step 7. For the Cadillac Grill work I used another ProTac 2AA LED but taped a blue gel over the front. I’m still only 2 feet from the Caddy while I applied about 3 seconds of blue light to the Grill.
![]()
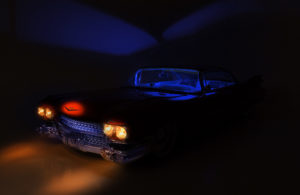 Image #8 – Step 8. I stepped back away from the Grill just out of the picture and Lightpainted some Headlight “streaks of light” on the floor … about 2 seconds per streak … that’s about 4 seconds total using my original ProTac 2AA LED Flashlight.
 ![]()
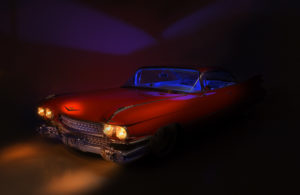 Image #9 – Step 9. From my location just out of the picture I applied some light to the front body and hood area about 4 seconds … and a little bit of light on the lower Cyc Wall next to the passenger side of the Caddy … about 2 seconds.
 ![]()
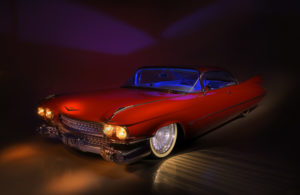 Image #10 – Step 10. With the front of the car complete and my flashlight turned off I walk through the picture to position myself for Lightpainting the side of the Caddy. Because the studio is dark I am not seen in the picture as I walk in front of the camera.
![]()
I am now standing just out of the picture on the driver’s side and apply light to the entire length of the Caddy … about 4 seconds of light.
Then I stepped into the picture and added an additional 1 second of light to the front wheel from about 2 feet away. The result is a brilliant wheel reflection on the floor … I love it.![]()
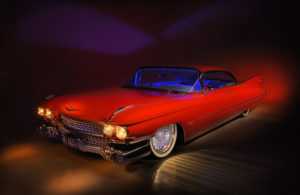 Image #11 – Step 11. My final application of Lightpainting was 3 seconds of Red Tail light on the Cyc Wall behind the driver’s side tail fin. I used a 3rd ProTac 2AA LED flashlight, but this one has a red gel taped to the front.
Voila’…the camera shutter closes and the 30 seconds Exposure time has ended … the “Red Caddy” Lightpainting is complete.
If you add up the amount of time I applied Lightpainting to the Caddy it totals about 25 seconds … the extra 5 seconds of the 30 seconds exposure time is taken up as I move from one area of the car to the next.
PSW 2018 … Thursday May 31 at 6:30 – 7:30PM
Getting Ready to Go Pro … a Special Event for PSW 2018 Orlando.
PSW 2018 … Friday June 1 at 8:00 – 9:00AM
Sports Action High Speed Sync Lighting:
This class is for any photographer wanting to learn about using FLASH with High Speed Sync mode for photographing Sports Action.![]()
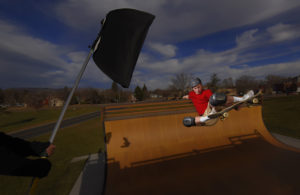 Image 12 Skateboarder Half Pipe … Nikon D750(Group Area AF), ISO1000, 1/4000 at f14, Nikon 14-24mm lens, WB 6250K, 4 Nikon SB-910 Speedlights Manual Full Power mounted in the FourSquare Soft Box, Painters Pole used as a lightstand, RadioPopper system, Nikon SU-800 Commander, SanDisk 32G Extreme Pro Flash Card.
NOTE: Here is a link to my website: Behind the Scenes video that follows me throughout the photo shoot using Nikon Speedlights in High Speed Sync (HSS) with Half Pipe X-Games Champion Jono Schwan:
https://daveblackphotography.com/behind-the-scenes-video/
NOTE: Nikon users need to set their camera to AUTO FP 1/250s in the Custom Settings Menu under Bracketing/Flash. Canon users can activate High Speed Sync (HSS) directly on your Speedlite. These procedures for each unit activates the High Speed Sync (HSS) feature which enables the Speedlights to perform at shutter flash sync speeds faster than 1/250 of a second so you can stop the action …ex:1/500, 1/1000, 1/2000 and even 1/4000 shutter speed.
These HSS Flash Action images made with Nikon Speedlights, Profoto B1 strobe are all set in High Speed Sync mode and make use of a Triangle Lighting Configuration.![]()
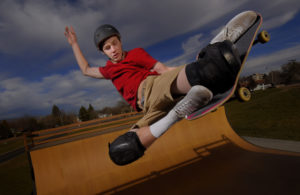 Image 13 Half Pipe Skateboarder …. Nikon D750, ISO1000, 1/4000 at f14, Nikon 14-24mm lens, WB 6250K, 4 Nikon 910 Speedlights High Speed Sync Manual Full Power mounted in the FourSquare Soft Box, Painters Pole used as a lightstand, RadioPopper system, Nikon SU-800 Commander, SanDisk 32G Extreme Pro Flash Card
Here is the final picture using Speedlights and a Triangle Lighting Formula: Camera, Subject, 4 Speedlights Off-Camera mounted in a FourSquare Softbox. By purposely underexposing the image by -1.7 the background scene becomes dark. The use of Flash will make my subject “Pop” from the darkened background scene.
I will typically use 4 Speedlights at Manual Full Power output to illuminate my action subject and reveal them from a purposely -1.7 underexposed exposed scene during bright sunshine conditions. Overcast skies might only require 2-3 Speedlights at Full power, but that also depends on how close the Speedlights are to the action subject.![]()
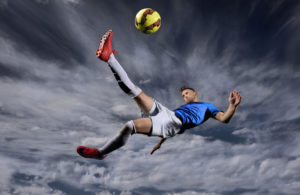
 Image 14 Soccer Scissor Kick … Nikon D810 (Single Point AF), ISO800, 1/2500 at f14, Nikon 14-24mm lens (at 19mm) with Polarizer Filter, WB 6250K, 2 Profoto B1 Air strobes in High Speed Sync mode with clear glass Protection Plate and Telle-Zoom Reflector, Manfrotto Lightstands, SanDisk Extreme Pro 32G Flash Card.
Clouds in the skies provided an awesome backdrop for our athlete. This set-up makes use of 2 B1 Air strobe units in High Speed Sync that are placed Off Camera to the left and right of the athlete just out of the frame. By purposely underexposing the scene by -2.0 and using a Polarizer Filter I increased the drama in the sky.
Each B1 Air strobe is set at FULL Power and has a Tele-Zoom Reflector, while my camera is set to a fast action shutter speed of 1/2500.
I’m lying on the ground next to a gymnastics crash matt which allows a comfortable landing area for the athlete who made 15 Scissor Kicks. My low angle of view gives the impression of great height to our athlete and easily places him against the entire sky.![]()
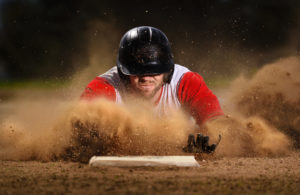 Image 15 Baseball Slide … Nikon D750, ISO250, 1/4000 at f6.3, Nikon 80-400mm lens (at 230mm), WB 6250K, 2 Profoto Bi Air strobes in High Speed Sync mode with clear glass Protection Plate and Telle-Zoom Reflector, Manfrotto Lightstands, SanDisk Extreme Pro 32G Flash Card.
A similar 2 strobe lighting set-up as Image #3 Soccer Scissor Kick, I placed 1 strobe camera left and slightly behind the player’s right shoulder. This slightly backlights the helmet and flying sand.
The second strobe is placed camera right and slightly in front of the athlete. This strobe illuminates the face with Rembrandt Lighting with a triangle of light visible under the athlete’s right eye.
PSW 2018 … Friday June 1 at 3:00 – 4;00PM
“The Right Stuff” a SPORTS Shooters Guide:
This class is for any photographer Beginner to Advanced and from Arm Chair QB to Franchise Player who wants to learn the pro techniques and strategies for photographing SPORTS and what Gear to bring to the game. So come on get out of the dugout and join the fun and learning!
The Right Stuff is a LIVE “spin off” of my latest and most popular SPORTS class at KelbyONE: Sports Photography: The Tools and Techniques to Get the Shot.
During this 60 minute class I will present as many SPORTS examples/scenarios as humanly possible with imagery and advice. The camera settings I use and how best to photograph each SPORT along with specific and often times “unique” gear that will help the photographer get the shot will be discussed.
Here are just a few of the 20 SPORTS I plan to include in this FAST PACED class … So pack your track shoes and hold on to your helmet because this class could leave you breathless.![]()
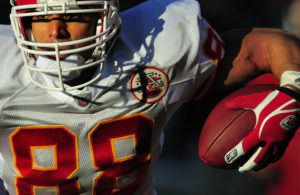 Image #1 … Football: With so many games and competitions being played at night under the lights the “Work Horse” lens of SPORTS and especially Football is the 400mm f2.8.
All this being said, if you have the luxury of having good lighting, the NEW AF-S NIKKOR 180-400mm f/4E TC1.4 FL ED VR with built in 1.4x converter makes a compelling argument and it’s SHARP … $12,400 price tag and worth it. Make sure you have a solid monopod for any large lens as no tripods are allowed on the sidelines.
Single point AF is a great choice for Auto Focus but Group Area AF is more forgiving if you are new to SPORTS action shooting. Auto ISO can be extremely useful especially late in the season when players are running into the sunshine from the deep dark shadow of the stadium … the ISO will compensate instantly as they break into the bright sun.
“Fill the Frame” with your marque player and try to take a knee on the sideline to get a low angle of view at the players as it will make them look bigger and more heroic.![]()
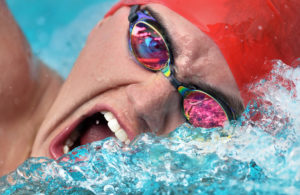 Image #2 … Swimming: HS, College, Olympic Swimming is a LONG GLASS SPORT: 180-400mm, 400mm, 500mm, 600mm 800mm and 1.4x converter … it’s all about the athletes face above the water and photographers are not very close.
Your goal is to “FILL the Frame” with the athletes face. Use very fast shutter speeds: 1/1000, 1/2000 (great choice) and 1/4000 (totally amazing) and freezes every single water droplet.
Place the Single AF point just above the middle of a horizontal frame profile to the athlete for Freestyle and Backstroke so it clears the water and locks-on to the athletes face. Breast Stroke and Butterfly can be shot profile but head-on is usually preferred by publications.![]()
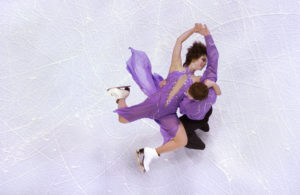 Image #3 … Figure Skating: and Gymnastics … Indoor lighting and fast action means High ISO cameras are a must along with 70-200mm f2.8 or a 200mm f2.0 lens.
These are individual/isolated sports where the athlete(s) are not part of a team during a game. If possible try to know some of the athlete’s program/routine and skill placement on the ice or Gymnastics apparatus of the top competitors. This will help you “nail” some guarantee images.
Top competitors often have a “signature skill” that they are known for. Learn where that skill occurs on the ice and choose your rink side photo position to best capture that skill.
Go up high, use REMOTE camera locations in the catwalks and shoot down. This high angle cleans the background of any distracting elements that can ruin a good action image. Capture the story of the athlete’s success/celebration, or defeat/fall. Slow the action down and make some artistic imagery. Shutter speeds like: 1/30, 1/15, 1/8 can capture beautiful impressionistic imagery of Gymnastics and Figure Skating.![]()
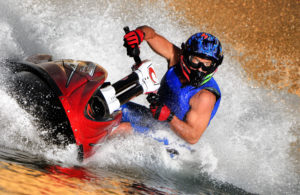 Image #4 … Adventure: Adventure and X-Game SPORTS are becoming more popular every day. Rock Climbing, Mountain Biking, Skate Boarding, Snow Boarding, Wake Boarding, Kayaking, Surfing and Outdoor SPORTS are fun to photograph. There is a huge market place of magazines and sponsorship companies that use imagery from the Adventure genre’.
A wide range of camera gear, lenses, and accessories are involved, often times specific to the SPORT itself of which close access is awesome with short lenses like 14-24mm f2.8, 16-35mm f4, 24-70mm f2.8.
The more familiar you are with the SPORT the more likely you are to get to know the people involved. The more you are involved the more you are likely to become included in the inner circle and thus, get special access and have athletes do special things for you.
Adventure can include the landscape where the athlete does the SPORT. Learn some High Speed Sync FLASH photography so you can frame the “lit” athlete in their environment of mountains, woodlands, water, etc.
PSW 2018 … Friday June 1 at 4:15 – 5:15PM
Lightpainting: “Fun in the Dark”
This class is for any photographer Beginner to Advanced who wants to learn the most creative photographic lighting technique …come on, you can do this!
What’s in my bag for Lightpainting:
* 35mm DSLR camera that is capable of changing lenses,
* Short Zoom lenses (example: I like to use: 24-70mm, 16-35mm),
* Sturdy Tripod, and a Head Lamp
* LED flashlight (150 Lumens or more!)
* NOTE: For big landscapes I have used a 2 million candle powered Brinkmann rechargeable spotlight for years but they are no longer in business…but any had-held rechargeable spotlight of 1-2 million candles of power will do nicely… example: Today I use the Larson Electronics RL-85 … 5 million candle powered rechargeable spotlight. https://www.larsonelectronics.com/p-1919-5-million-candlepower-handheld-rechargeable-spotlight-100w-halogen-spot-flood-57-lens.aspx
(NOTE: small pocket cameras or cameras that do not have Manual Exposure capability or cannot change lenses are not suitable for making Lightpaintings)
The word photography in the Greek means “light writing.” Simply said, Lightpainting is the revealing of the subject from darkness with light. In general, Lightpaintings make use of long exposure times like 3 seconds, 10 seconds, 30 seconds, 2 minutes, or more, while applying light to the subject.
Let’s begin with some basics and Lightpaint a small Still Life that can easily fit on your kitchen table.
I will need a dark environment for my little subject so close the door, draw the blinds and turn off the light after you compose the scene and focus on your subject (more about focus later in the article)
I will use a Manual Exposure of which I have a basic starting exposure which I begin many of my Lightpaintings with: ISO500, 30 seconds at f8. This basic starting exposure certainly does not work for every Lightpainting, but it is a good starting point for many of them.
During the 30 seconds exposure time I will use a small mobile light source (150 Lumen LED penlight) to illuminate the subject in the scene revealing it from the dark with Lightpainting.
For my Still Life and LIVE model Lightpaintings. A small LED flashlight with 150 Lumens will do nicely. I use a small Stylus LED penlight (AAAA batteries) made by Streamlight: http://www.amazon.com/Streamlight-65018-Stylus-4-Inch- Penlight/dp/B00008BFS5/ref=sr_1_5?ie=UTF8&qid=1431293035&sr=8-5&keywords=stream+light+stylus+pro
First: I arrange my subject and compose the scene.
Then: I secure the camera on a sturdy tripod.
And: With the studio lights turned “on” I Auto Focus on the subject.
And then: I turn “off” the auto focus.
This is so the auto focus does not activate or “search” in the dark when I turn off the lights, open the shutter, and begin to Lightpaint.
I use the Auto Focus (AF) back button on my Nikon camera. By simply releasing my thumb from the AF button on the back of the camera it stops activation of the Auto Focus operation. Or you can also simply turn OFF the AF switch on the barrel of the lens or on the camera body.
I will use a Manual WB of 10,000 Kelvin when Lightpainting with any LED flashlight. This WB setting helps add a warm color tone to the overall picture. And I will also activate the Long Exposure Noise Reduction mode in the camera found in the Photo Shooting Menu if the exposure time exceeds 30 seconds … this prevents any noise speckles from appearing due to the long exposure time that generates heat inside the camera.
With my usual Manual exposure: ISO500, 30 seconds at f8.0
I’m now ready to turn OFF the room lights and make my first “TEST SHOT” without adding any Lightpainting to the subject …I just want to see if there is any unwanted ambient light creeping in from a window or the door.
With my TEST shot complete, a dark or “Blank” image appears on the LCD screen. Now I’m now I’m ready to add some Lightpainting during my second shot. ![]()
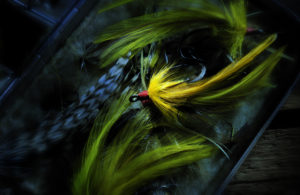 Image 1 Yellow Tail Fly … Nikon D3s, ISO500, 30 seconds exposure at f8, Nikon 24-70mm lens, WB 10,000K, Manfrotto Tripod and 410 Geared Head, Stylus LED penlight, SanDisk 32G Flash Card.
“If I want a picture to look interesting I only light part of it” …I like to apply the light from off camera angles to create a dramatic lighting effect. My Stylus penlight is only 10 inches away from most of my Still Life subjects. The light is applied into the scene from a variety of angles.
The closer the light source is to the subject, the brighter the subject becomes. Also said, the longer time I spend illuminating my subject the brighter the subject becomes. Too much light or too much time spent applying light can overexpose portions of the image…and vise verse.
I try to keep the light source (Stylus) moving while applying the light, usually in a swirling or brushing motion. This helps soften the transitional edges between light and shadow, which is key in creating a painterly quality to the picture. You are in effect “painting with light.”
My basic Manual Exposure setting of ISO 500, 30 seconds at f8 is a good basic starting exposure, but it can vary depending on intensity of your own flashlight and the distance from flashlight to subject, and also how large is your subject. Don’t give up, I sometimes make 10-15-20 Lightpaintings before I get 1 that I really like.![]()
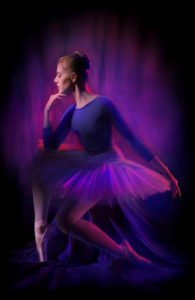 Image 2 Ballerina Thinking … Nikon D850, ISO500, 30 seconds at f5.6, Nikon 16-35mm lens at 35mm, WB 10,000K, Manfrotto Tripod with 410 Gear Head, Stylus penlight, SanDisk 32GB Extreme Pro Flash Card.
Lightpainting people is a lot of fun and can produce a very lovely portrait …as long as the model remains perfectly still during the long exposure time of 30 seconds. My advice is to find a very patient subject to Lightpaint.
I used ISO500 and my Stylus penlight for this Lightpainting of a Ballerina. I Lightpaint the models face with the Stylus from about 2 feet away and only for 2 seconds. Any longer time painting or any closer to the subject with the flashlight and the model will probably blink, thus causing blurring of eyes.
After I Lightpainted her face for 2 seconds, shoulders and torso for 3 seconds, Toto costume for 2 seconds, leg and Ballet Toe Shoes for about 3 seconds (10 seconds total) … Then I manually unfocused the lens about half way to infinity … I call this “Soft Focus” … and then I continued Lightpainting the background out of focus for about 5 seconds. I also used 2 colored LED flashlights on the background, Red and Blue to create a pink-violet color.
NOTE: It took about 15 accumulated seconds of time to walk around the Ballerina applying the light from different angles, and walk to the camera to unfocus the lens and then return to the ballerina. Factor in about 5 seconds to “think” about where to apply the light … all time added up totaled 30 seconds.![]()
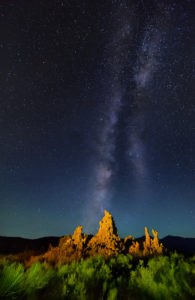
Image 3 Tufa Galaxy … Nikon D750, ISO6400, 20 seconds at f5.0, Nikon 16-35mm f4.0 lens, WB 4000K, Manfrotto Tripod with 410 Gear Head, 2 million candle rechargeable spotlight (GOOGLE search 2 million candle powered spotlight work), SanDisk 32GB Extreme Pro Flash Card.
NOTE: For big landscapes I have used a 2 million candle powered Brinkmann rechargeable spotlight for years but they are no longer available…but any hand-held rechargeable spotlight of 2 million candles of power will do nicely.
Today I use the Larson Electronics RL-85 … 5 million candle powered rechargeable spotlight. https://www.larsonelectronics.com/p-1919-5-million-candlepower-handheld-rechargeable-spotlight-100w-halogen-spot-flood-57-lens.aspx
Tufa Galaxy breaks the routine of basic Lightpainting with its unusual exposure settings of ISO6400, 20 seconds at f5. The extremely high ISO and wide aperture enable the Milky Way to be seen over Mono Lake.
While the exposure time of 20 seconds at f5.0 captures the Milky Way motionless, I add Lightpainting with my 2 million candle spotlight on the from my OFF Camera location to the left. My WB of 4000K keeps the sky a dark “deep space” blue while the warm colored light from my 2 million candle powered spotlight added a warm tone to the Tufa and grass. ![]()
Looking forward to meeting everyone at PSW 2018 in Orlando … and, I’ll See all of you next time here on Workshop at the Ranch. Adios Dave.


