2017 June WATR… How Was That Shot Made?
![]()
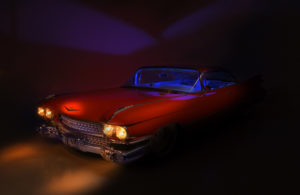
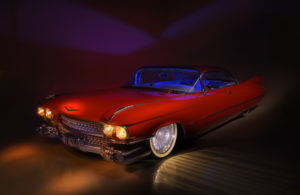
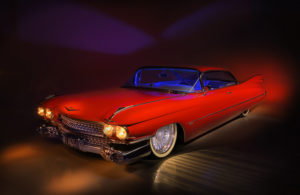
Hi and welcome to the June edition of my Instructional BLOG (WATR). I get a lot of emails simply asking “How Was That Shot Made?” So, here are the details of how the Red Cadillac Lightpainting from my portfolio is made.
![]()
Come learn Lightpainting and a variety of Night Photography imagery at the: Night Photography Summit in Ashville, North Carolina August 11-13, 2017. I will be presenting with some of the nation’s BEST nocturnal photographers for 3 Days of instructional presentations and seminars.https://nightphotographysummit.com/index.html
![]() How Was That Shot Made?
How Was That Shot Made?
I have broken down this Lightpainting image into 11 step-by-step images for instructional purposes. I do not “layer” the images in Photoshop.
All my Lightpaintings are made in-camera as one single RAW file image. Its fine if you would rather “assemble” your Lightpaintings in Photoshop, but I like to make a single “photograph” … the choice is yours.
My LED flashlight for Car size Lightpaintings:
I use the ProTac 2AA LED Flashlight made by Streamlight, but any LED flashlight with 150 Lumens will do nicely for car size Lightpaintings.
NOTE: The ProTac 2AA LED flashlight can usually be ordered by Batteries Plus. If Batteries Plus is not in your area, LOOK at the bottom Right-hand corner of the Streamlight website page: http://www.streamlight.com/en-us/product/product.html?pid=201 …you will see a box: FIND a DEALER. Type in your zip code, click SEARCH, and a list of Streamlight product dealers will come up.![]()
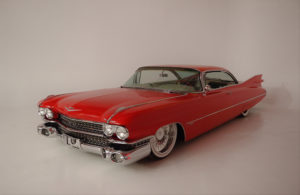
Image 1 – Step 1. Red Caddy … Nikon D5 with available ambient studio fluorescent lighting.
First we backed the 1964 Red Cadillac into the studio so that it set diagonally into the corner about 6 feet from the Cyc Wall … “Cyc” is an abbreviated term for cyclorama. Webster defines a cyclorama as “a curved wall used as a background of a stage set to suggest unlimited space or an infinity floor to wall appearance.” ![]()
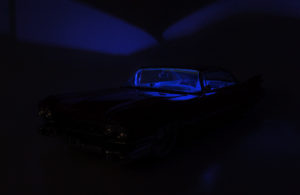
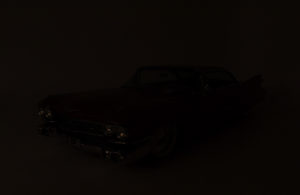 Image 2 – Step 2. Red Caddy … Nikon D5, ISO500, 30 seconds at f8, NIKKOR 24-70mm f2.8 lens (at 35mm) WB 10,000K.
My Nikon D5 camera is mounted on a tripod and I use a Manual Exposure for all my Lightpaintings. I begin my Lightpaintings by making a dark “BLANK” image with NO Lightpainting. I usually begin with my standard “Baseline Exposure” of ISO500, 30 seconds at f8. Note the WB 10,000K which helps make a standard cool/white LED flashlight turn a pleasing warm tone of light.
In this image the “Baseline Exposure” is very dark, but there is a tiny bit of ambient light that is leaking in through the top of the studio garage door. No worries, it’s “dark enough” for Lightpainting and the dim ambient allows me to see where I’m working during a 30 seconds exposure time.
NOTE: If the ambient had been much brighter I would have adjusted the exposure by either lowering the ISO or increasing my aperture …
NOTE: I sometimes use a digital cable release and have a longer exposure time and adjust the ISO and aperture accordingly, but for teaching purposes I will stay with a 30 seconds exposure time as every camera is capable of doing so.![]()
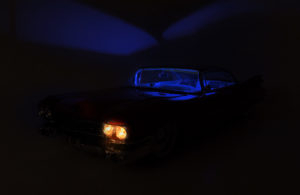
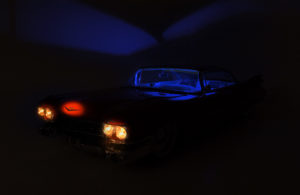
Image 3 – Step 3. With my exposure set at ISO500, 30 seconds at f8 I place a Blue LED light on the front seat of the car. I use an assortment of colored LED light made by LazerBrite www.lazerbrite.com These little colored LED’s are perfect for illuminating the interior of cars, engine area, or underneath the car as well.
The Blue LED is turned “ON” for the entire exposure time of 30 seconds and it illuminates the interior of the Caddy, but also castes a nice design on the Cyc Wall … a great bonus in my opinion.![]()
Now the FUN part … Lightpainting the 1964 Red Cadillac:
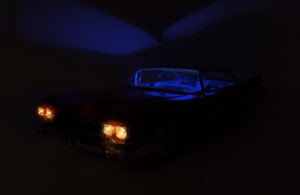
Image 4 – Step 4. With my Exposure at ISO500, 30 seconds at f8 and my Blue LED placed on the front seat, I am now ready to begin making Lightpaintings of this classic 1964 Red Cadillac.
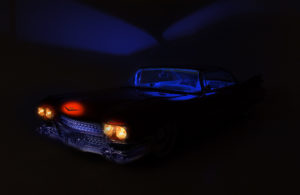
Using the ProTac 2AA LED flashlight I simply stand in front of the car and Lightpaint the left Headlight for about 1 second of light … the distance from LED to Headlight is about 2 feet. ![]()
Image 5 – Step 5. Then I moved to the right Headlight and did exactly the same application of light … about 1 second of light. This illumination of the Headlights brings “Life” to the car as if it were turned on.![]()
Image 6 – Step 6. Now I apply a similar application of Lightpainting to the Cadillac hood ornament, from about 2 feet away and for about 2 seconds.![]()
Image 7 – Step 7. For the Cadillac Grill work I used another ProTac 2AA LED but taped a blue gel over the front. I’m still only 2 feet from the Caddy while I applied about 3 seconds of blue light to the Grill.![]()
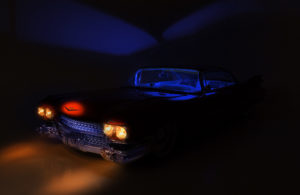
Image 8 – Step 8. I stepped back away from the Grill just out of the picture and Lightpainted some Headlight “streaks of light” on the floor … about 2 seconds per streak … that’s about 4 seconds total using my original ProTac 2AA LED Flashlight. ![]()
Image 9 – Step 9. From my location just out of the picture I applied some light to the front body and hood area about 4 seconds … and a little bit of light on the lower Cyc Wall next to the passenger side of the Caddy … about 2 seconds. ![]()
Image 10 – Step 10. With the front of the car complete and my flashlight turned off I walk through the picture to position myself for Lightpainting the side of the Caddy. Because the studio is dark I am not seen in the picture as I walk in front of the camera.![]()
I am now standing just out of the picture on the driver’s side and apply light to the entire length of the Caddy … about 4 seconds of light.
Then I stepped into the picture and added an additional 1 second of light to the front wheel from about 2 feet away. The result is a brilliant wheel reflection on the floor … I love it.![]()
Image 11 – Step 11. My final application of Lightpainting was 3 seconds of Red Tail light on the Cyc Wall behind the driver’s side tail fin. I used a 3rd ProTac 2AA LED flashlight, but this one has a red gel taped to the front.
Voila’…the camera shutter closes and the 30 seconds Exposure time has ended … the “Red Caddy” Lightpainting is complete.
If you add up the amount of time I applied Lightpainting to the Caddy it totals about 25 seconds … the extra 5 seconds of the 30 seconds exposure time is taken up as I move from one area of the car to the next.![]()
NOTE: Lightpainting is a Creative Process in Real Time:
I made 12 Lightpaintings before I felt I had the “one single image” that captured what I “envisioned” the Red Caddy could look like.
The early attempts were a variety of results “getting a feel” for how much or how little light is required … too much light here … not enough light there, usually occurs during the first 5-10 attempts. The last few attempts tend to produce the BEST single image Lightpainting and great satisfaction.
I hope you have enjoyed how this shot was made … Come FOLLOW me on Instagram @daveblackphoto and learn about photography.
![]()
I’ll see you here next month here on WATR.
“There’s always more to learn” …Adios. Dave


