2017 January WATR… Your Questions & My Answers
 Hi and welcome to the January 2017 edition of my Instructional BLOG (WATR) … I’ve received tons of emails via my website Contact Dave page with your questions:
https://daveblackphotography.com/contact-dave/
… so without any further delay let’s check out: Your Questions and My Answers.
![]()
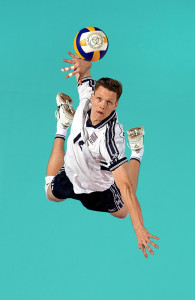
 Image #1 Serves Up II … Nikon D1, ISO250, 1/500 at f6.3, Nikon 70-200mm zoom lens, WB 6250K, 2 Manfrotto Magic Arms and Super Clamps with one Manfrotto 410 Gear Head, Safety Cables, 4 Elinchrom Strobes, PocketWizard Multi MAX Transceivers and LPA Design Pre-Release Trigger, SanDisk Flash Card.
Q…Hi Dave, I watched your volleyball and baseball training sessions on www.kelbyone.com and your tips and pointers were extremely valuable including using REMOTE Cameras. What gear do you use to mount your Remote Cameras over-head for Volleyball?
Thank you!
Michael
A… Hi Michael. Glad you enjoyed the KelbyOne video class.
My KelbyOne video on Baseball shows all of my Remote gear and assembly, check it out as well www.kelbyone.com
OK Michael, here are some Remote Camera tips and gear suggestions:
* Get permission from the arena-sports info department or event media person in charge.
* You should have liability insurance of 2.5 million dollars…standard amount for this kind of photo work … sounds extreme but it is not that expensive.
* Remove anything from your shirt or vest that could fall out … keys, glasses, hat, etc. … you don’t want anything to drop from the catwalks.
* Install the Remote camera when no one is on the arena floor below you.
* Use 2 Manfrotto Magic Arms to secure the camera.
* If the lens is long telephoto and has a foot mount secure that to the catwalks as well with Magic Arm.
* Use double safety cables.
* I use a Manfrotto 410 Gear Head
* Use a lite weight camera if you have one … ex: Nikon D750 or D500
* I use the PocketWizard system to trigger the Remote … You’ll need a “Pre-Release” cable between the camera and PocketWizard … it keeps the camera turned on continually so as to “trigger” instantly.
* Once you have focused on the area (the top of the net for Volleyball or just below the rim for basketball) tape down the focus ring.
* TEST-Shoot the system during practice … and then replace the camera battery for the game.
* Remove the Remote camera after everyone has cleared the competition floor … that could mean you come back the next day to do so.
Hope this list is helpful Michael. Have a good shoot. Dave
![]()
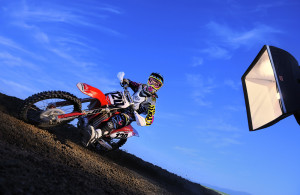
 Image #2 Moto Twilight …Nikon D3x, ISO250, 1/4000 at f6.3, Nikon 24-70mm zoom lens (at 70mm), WB 6250K, 4 Nikon Speedlights mounted in the FourSquare Softbox, 1 Manfrotto Tripod to support the FourSquare, SanDisk 32G Flash Card.
Q…Hey Dave. We met in Denver at the Summit SPORTS workshop: http://www.photographyatthesummit.com/
I’m trying to remember how to achieve the Moody Blue look for a few my own Motocross shots. Stopping Down the Exposure? Kelvin WB?? Warming Gels on Speedlights???
Any help is much appreciated Dave!
Thanks. Charlie
A…Hi Charlie. Sure, I remember you … hope all is going well.
This moto image was made in 2009 and is still a favorite example of what I call the “Moody Blue” formula. I underexposure anywhere from -1.7 down to -2.3 stops depending on how much drama I want to illustrate … I use 4 Speedlights, of which as of 2015 I use the Nikon SB-5000 Radio Control Speedlights with Nikon Orange warming gels, and then I set my White Balance at 3030K.
The underexposed scene is made a cool blue by using a WB 3030K. Today my 4 SB-5000 Speedlights with Radio Control reveal the subject from the underexposure, and the Nikon Orange Warming Gels that come with the Speedlights counter balance the cool blue color tone of the scene with warm “Golden Hour” light.
Here is a link to one of several Workshop at the Ranch examples regarding Moody Blue formula: https://daveblackphotography.com/workshop-at-the-ranch-november-2008-action-with-the-sb-900-speedlights/
You can also simply type Moody Blue in the SEARCH BOX on my Instructional BLOG – Workshop at the Ranch page and several instructional articles will pop up pertaining to Moody Blue.
Good luck. Hope to see you at the Summit SPORTS Workshop July 2017: http://www.photographyatthesummit.com/ Adios. Dave ![]()
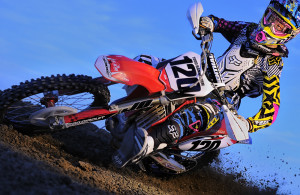
 Image #3 Moto Twilight: Speedlight location … All exposure setting are the same as Image #2
This image shows the close positioning of the 4 Nikon Speedlights mounted in the FourSquare softbox: http://www.lightwaredirect.com/
Each Speedlight is “zoomed” to 200mm to help concentrate all the light directly at the action subject.
This image was actually made around 10:00AM. I have removed the front screen of the softbox to allow all the light to illuminate the subject. As the sun was breaking through the clouds l set all 4 Speedlights at FULL Power. ![]()
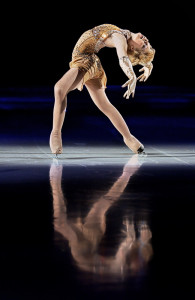
 Image #4 Skater’s Reflection …Nikon D1, ISO800, 1/1000 at f2.0, Nikon 200mm f2.0 lens, WB 6250K, SanDisk 32G Flash Card.
Q… Hi Dave
I am a big fan of your tutorials in KelbyOne and I was wondering if you could help me out with some tip and tricks for Ice Skating:
Many, many, many thanks in advance!!!
Kind Regards
Stefan
A… Hi Stefan.
Shooting Ice Skating usually requires very high ISO and especially a fast shutter speed of 1/1000 or faster if possible. This being said I would advise using a “fast” lens with a wide-open aperture of f2.0 or f2.8.
Like with any sport, anticipation of what the athlete is about to perform is a key component to making great SPORTS action pictures.
Try to study a practice session and learn the skaters program, thus enabling you to better “anticipate” the skills they perform … then you will likely have good timing to capture a great action image.
If possible look for the skater’s reflection in the ice. This is best accomplished during the Ice Skating Show under theatrical lighting with the first skater that performs after the ice has been resurfaced. Shoot vertical (portrait) and place the skater in the top half of the frame … then look for the reflection and make your picture.
Hope these suggestions help you.
Cheers. Dave
![]()
GREAT QUESTIONS Everyone! … Please keep sending them in via my Contact Dave page on the website. https://daveblackphotography.com/contact-dave/
“There’s always more to learn” … see you next month here on WATR.
Adios. Dave


