
Workshop at the Ranch – September 2008 – Long Island Photo Workshop
 Hi and welcome to this edition of Workshop at the Ranch. I have had the pleasure to be part of many photography workshops over the years. Most of them revolved around sports and action photography although I have also been part of the faculty at a few landscape and nature workshops as well. Recently I was asked to join the staff of the Long Island Photo Workshop (www.liphotoworkshop.com) for their annual series of classes that take place each year in early August. The program’s director Jerry Small explained that this workshop centers around wedding portraiture, lighting, and the fine art of making a finished portrait. Those who would attend the workshop would primarily come from the wedding industry and fine portraiture studios.
Hi and welcome to this edition of Workshop at the Ranch. I have had the pleasure to be part of many photography workshops over the years. Most of them revolved around sports and action photography although I have also been part of the faculty at a few landscape and nature workshops as well. Recently I was asked to join the staff of the Long Island Photo Workshop (www.liphotoworkshop.com) for their annual series of classes that take place each year in early August. The program’s director Jerry Small explained that this workshop centers around wedding portraiture, lighting, and the fine art of making a finished portrait. Those who would attend the workshop would primarily come from the wedding industry and fine portraiture studios.
I then asked Jerry, “Why me? Have you seen my web site? … are you sure you want me? His response was “Joe McNally told me you are a master of light and that you would do a great job.” Wow!, what could I say to that except Yes (and thanks Joe!). Jerry then placed a very talented photographer who would be my right hand man arranging models, securing locations and organizing all the ground work on Long Island before and during the 4 day workshop. Ladies and gentlemen, give it up for Benny Migliorino (Migs) www.bennymigsphoto.com (get ready to rock when you check out Benny’s portfolio). I tell you the truth when I say I have never worked with a better assistant/location manager. Benny did it all, worked tirelessly, and was a pleasure to work with. His expertise, drive, and attitude made for a great workshop for the entire class of 20 students.
This workshop is very different from others I have taught at. There are 6 instructors who each offer a class on a particular subject. Hanson Fong, a brilliant wedding and portrait photographer from San Francisco offered Mastering The Techniques-How To Be A Complete Photographer. Joseph and Louise Simone, a husband and wife team from Canada who are true masters of portraiture taught their class How to Create Your Signature. Gary Small a great technician offered those who signed up for his Professional Digital Imaging class the complete seminar on Photoshop. Fay Sirkis, who is tops in her field, dazzled and taught her class all that Corel Painter is and can be. NIK Software’s leading authority Janet Wendt winged in from San Diego to teach her class Professional Polish with regards to the portrait image and what NIK offers today’s fine art portrait photographer. I rounded out the faculty teaching those who signed up for my class that Light Is The Greatest Influence and how to control light using Lightpainting, small off camera flash, and larger lighting systems with subjects on location.
With a group of instructors like this how could anyone choose just one, but that is the choice of the attendees, choose the instructor/class that interests you and then get ready to spend 4 days with that instructor and be emerged into the craft. With all this in mind, let’s see what each of the 4 days offered my students.
| Day 1 |
|
|
|
|
| Day 2 |
|
|
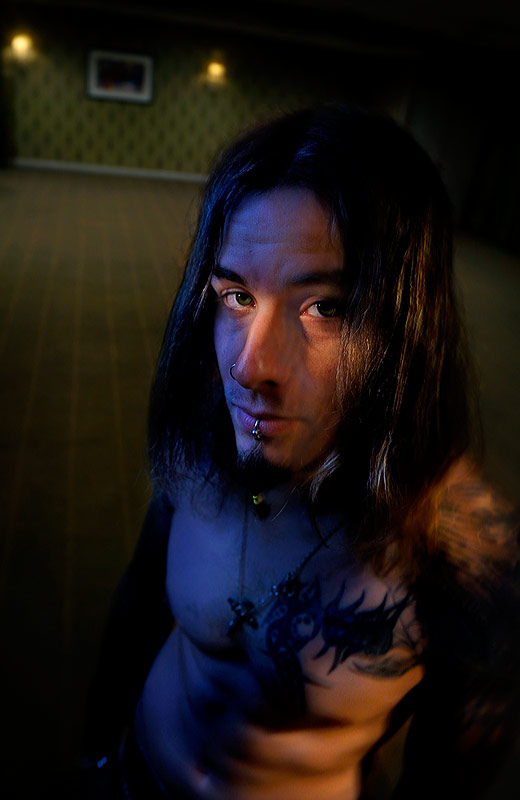
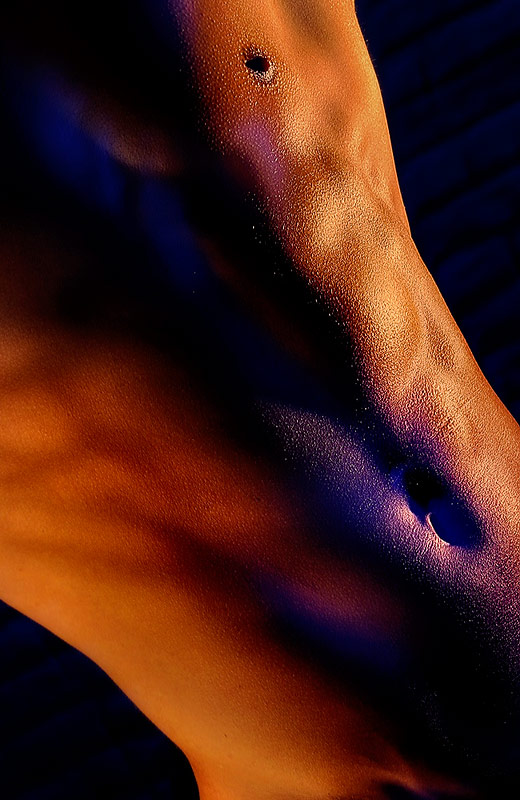 Small Off Camera Flash: session 2 Image #4 … The Male Torso … After lunch our class met outside in the courtyard of the hotel where we had a male body builder ready and waiting to pose for the second session of our small off camera flash study. Rather than demonstrating what I would do in this situation I had the class arrange and position the SB900 Speedlights where they wanted them. This is a great learning process of trial and error. Everyone voiced what to do, where to positions the lights, how much power output to use, gels, no gels, White Balance etc, I merely posed our subject, held the camera and took a shot after which the class examined the image and began making lighting corrections after their own critique. Our body builder was VERY patient with this circus of learning by trial and error, (not easy to do while posing outdoors, on display in front of 20 photographers with only a string speedo on), but I have found this session to be most valuable as the exchange of ideas and seeing the results on the LCD screen eventually result in some good pictures and also prepares the students for making their own images. Nikon D3, ISO100, 1/6 at f20, Nikon 24-70mm lens, WB 3030K, Two SB900 Speedlights i-TTL, Remote mode each with warming gel and power output of -1.0, the Speedlight to my right has a small Chimera softbox, Nikon SU800 Commander to trigger the Remote Speedlights, Lexar 8G Flash Card. A slight counterclockwise spin (30 degrees) was added to the camera at the time of exposure to give a slight spin-blur to portions of the image not illuminated by the Speedlights. (NOTE: I have written several articles in Workshop at the Ranch teaching the use of Nikon Speedlights. If you are not familiar with off camera Speedlight use please check out the previously written articles.) Small Off Camera Flash: session 2 Image #4 … The Male Torso … After lunch our class met outside in the courtyard of the hotel where we had a male body builder ready and waiting to pose for the second session of our small off camera flash study. Rather than demonstrating what I would do in this situation I had the class arrange and position the SB900 Speedlights where they wanted them. This is a great learning process of trial and error. Everyone voiced what to do, where to positions the lights, how much power output to use, gels, no gels, White Balance etc, I merely posed our subject, held the camera and took a shot after which the class examined the image and began making lighting corrections after their own critique. Our body builder was VERY patient with this circus of learning by trial and error, (not easy to do while posing outdoors, on display in front of 20 photographers with only a string speedo on), but I have found this session to be most valuable as the exchange of ideas and seeing the results on the LCD screen eventually result in some good pictures and also prepares the students for making their own images. Nikon D3, ISO100, 1/6 at f20, Nikon 24-70mm lens, WB 3030K, Two SB900 Speedlights i-TTL, Remote mode each with warming gel and power output of -1.0, the Speedlight to my right has a small Chimera softbox, Nikon SU800 Commander to trigger the Remote Speedlights, Lexar 8G Flash Card. A slight counterclockwise spin (30 degrees) was added to the camera at the time of exposure to give a slight spin-blur to portions of the image not illuminated by the Speedlights. (NOTE: I have written several articles in Workshop at the Ranch teaching the use of Nikon Speedlights. If you are not familiar with off camera Speedlight use please check out the previously written articles.) |
| Day 3 |
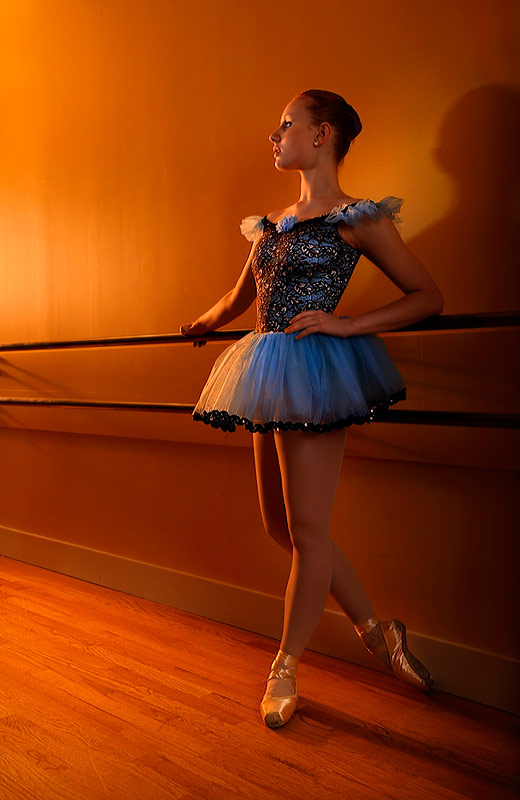 Bigger Strobes/bigger location: session: 1 Image #5 … Ballerina in Blue … The third day of class took us to two different locations. Early Wednesday morning our class rendezvoused at a Ballet studio about 40 minutes from our hotel. This was the day for bigger strobes, power packs, lightstands, softboxes etc. used in a bigger location. Our young ballerina was lovely and talented and easy to work with. I use the Elinchrom lighting system for some of my larger lighting jobs and for lighting sports arenas. Sometimes I use the Elinchrom 600 RX units, but often times I’m at a location where no AC outlets are available or there are too few AC outlets in the room or sports arena catwalk, so I use the Elinchrom Rangers which are portable battery powered 1100 watt/second strobe units. Kevin Lackey of Bogen was kind enough to supply our class with all the equipment we needed and attend in person to lend a hand and answer questions (www.bogenimaging.com) With the Elinchrom lighting system and Rangers I am able to make use of Elinchrom’s exclusive SKYPORT wireless triggering system. The Skyports are incredibly small yet powerful and plug into an Elinchrom power pack which allows me to dial the power up or down on each individual pack directly from the master Skyport transmitter attached to my camera hotshoe. With our ballerina in place I proceeded to lecture/demonstrate to the class the step by step assembly of lighting arrangements to create a variety of moods for our full body environmental portrait. This image used 3 Rangers, one with a large Elinchrom Softbox just out of the right side of the frame and pointed slightly away from my subject so as to feather a soft window light across her body. The second Ranger has a 10 degree grid that has been gaffer taped over so that only a 1/2 inch strip allows light through to the ballerinas face. It is hand held by Benny who aims it at our subjects face. The third Ranger is outside the studio building and is shooting light through the frosted window. It has a full CTO warming gel placed over a 20 degree grid and provides a warm sunset light that spreads across the studio wall and also adds an edge light to the subject. Nikon D3, ISO400, 1/250 at f9, Nikon 24-70mm lens, WB 5880K, Three Elinchrom Rangers (as previously described), Skyports, Lexar 8G Flash Card. Bigger Strobes/bigger location: session: 1 Image #5 … Ballerina in Blue … The third day of class took us to two different locations. Early Wednesday morning our class rendezvoused at a Ballet studio about 40 minutes from our hotel. This was the day for bigger strobes, power packs, lightstands, softboxes etc. used in a bigger location. Our young ballerina was lovely and talented and easy to work with. I use the Elinchrom lighting system for some of my larger lighting jobs and for lighting sports arenas. Sometimes I use the Elinchrom 600 RX units, but often times I’m at a location where no AC outlets are available or there are too few AC outlets in the room or sports arena catwalk, so I use the Elinchrom Rangers which are portable battery powered 1100 watt/second strobe units. Kevin Lackey of Bogen was kind enough to supply our class with all the equipment we needed and attend in person to lend a hand and answer questions (www.bogenimaging.com) With the Elinchrom lighting system and Rangers I am able to make use of Elinchrom’s exclusive SKYPORT wireless triggering system. The Skyports are incredibly small yet powerful and plug into an Elinchrom power pack which allows me to dial the power up or down on each individual pack directly from the master Skyport transmitter attached to my camera hotshoe. With our ballerina in place I proceeded to lecture/demonstrate to the class the step by step assembly of lighting arrangements to create a variety of moods for our full body environmental portrait. This image used 3 Rangers, one with a large Elinchrom Softbox just out of the right side of the frame and pointed slightly away from my subject so as to feather a soft window light across her body. The second Ranger has a 10 degree grid that has been gaffer taped over so that only a 1/2 inch strip allows light through to the ballerinas face. It is hand held by Benny who aims it at our subjects face. The third Ranger is outside the studio building and is shooting light through the frosted window. It has a full CTO warming gel placed over a 20 degree grid and provides a warm sunset light that spreads across the studio wall and also adds an edge light to the subject. Nikon D3, ISO400, 1/250 at f9, Nikon 24-70mm lens, WB 5880K, Three Elinchrom Rangers (as previously described), Skyports, Lexar 8G Flash Card. |
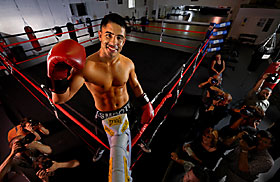
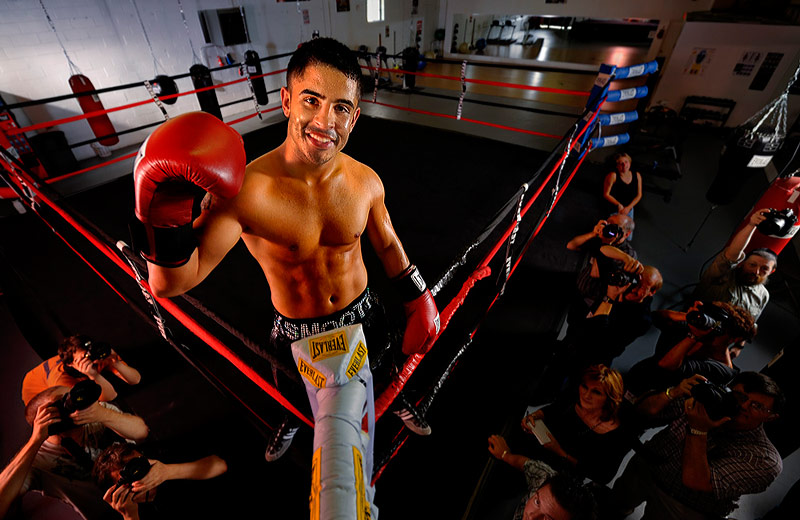 Bigger Strobes/Bigger Location: session 2 Image #6 … Heavy Hitter … Lunch on the run and then we all arrived at Heavy Hitters boxing gym in Bohemia, NY. Here we were greeted by feather weight champion Kristian Vasquez. What a great guy and perfect subject to work with. I used everything Kevin and Bogen provided and proceeded to light portions of the gym, the ring and of course, the CHAMP! While setting up the equipment and lighting arrangement our class had the chance to work Kristian over with photographs of him pummeling the speed bag. This gave him a good pump and plenty of sweat for the main event image. I underexposed the ambient light of the gym by 1 and 1/3 stop. I used one Ranger with a 20 degree grid in the far left corner of the gym to cut a diagonal shaft of light along the white wall. A second Ranger was bounced off the wall on my right in order to illuminate the far right corner of the ring and ropes, and the left side of Kristians face, chest, and left arm. Kristian’s right side, ribcage, and face are revealed with one Ranger bouncing light off the wall/American flag out of the frame to my left which gives him a slightly warmer skin tone thanks to the red stripes on the flag. I added a fourth Ranger with a 10 degree grid that has been gaffer taped over so that there is only a 1/2 inch slit that light can escape. That light is on a Bogen lightstand and is pointed at Kristian’s face. This slit of light gives a spotlight or Paramount Lighting effect that reveals the sweat on his face and catchlight in his eyes. I’m standing on a ladder and want you to know that the Skyports were invaluable in that I could increase or decrease the power output of each Ranger pack remotely without ever climbing down the ladder. With Kristian atop the ropes of the ring some of the class hammed it up to look like a media frenzy at the conclusion of a fight to photograph the champ. Nikon D3, ISO250, 1/125 at f11, Nikon 14-24mm lens, WB 5880K, Four Elinchrom Rangers with Wireless Skyport System, Bogen Lightstands, Lexar 8G Falsh Card. Bigger Strobes/Bigger Location: session 2 Image #6 … Heavy Hitter … Lunch on the run and then we all arrived at Heavy Hitters boxing gym in Bohemia, NY. Here we were greeted by feather weight champion Kristian Vasquez. What a great guy and perfect subject to work with. I used everything Kevin and Bogen provided and proceeded to light portions of the gym, the ring and of course, the CHAMP! While setting up the equipment and lighting arrangement our class had the chance to work Kristian over with photographs of him pummeling the speed bag. This gave him a good pump and plenty of sweat for the main event image. I underexposed the ambient light of the gym by 1 and 1/3 stop. I used one Ranger with a 20 degree grid in the far left corner of the gym to cut a diagonal shaft of light along the white wall. A second Ranger was bounced off the wall on my right in order to illuminate the far right corner of the ring and ropes, and the left side of Kristians face, chest, and left arm. Kristian’s right side, ribcage, and face are revealed with one Ranger bouncing light off the wall/American flag out of the frame to my left which gives him a slightly warmer skin tone thanks to the red stripes on the flag. I added a fourth Ranger with a 10 degree grid that has been gaffer taped over so that there is only a 1/2 inch slit that light can escape. That light is on a Bogen lightstand and is pointed at Kristian’s face. This slit of light gives a spotlight or Paramount Lighting effect that reveals the sweat on his face and catchlight in his eyes. I’m standing on a ladder and want you to know that the Skyports were invaluable in that I could increase or decrease the power output of each Ranger pack remotely without ever climbing down the ladder. With Kristian atop the ropes of the ring some of the class hammed it up to look like a media frenzy at the conclusion of a fight to photograph the champ. Nikon D3, ISO250, 1/125 at f11, Nikon 14-24mm lens, WB 5880K, Four Elinchrom Rangers with Wireless Skyport System, Bogen Lightstands, Lexar 8G Falsh Card. |
| Day 4 |
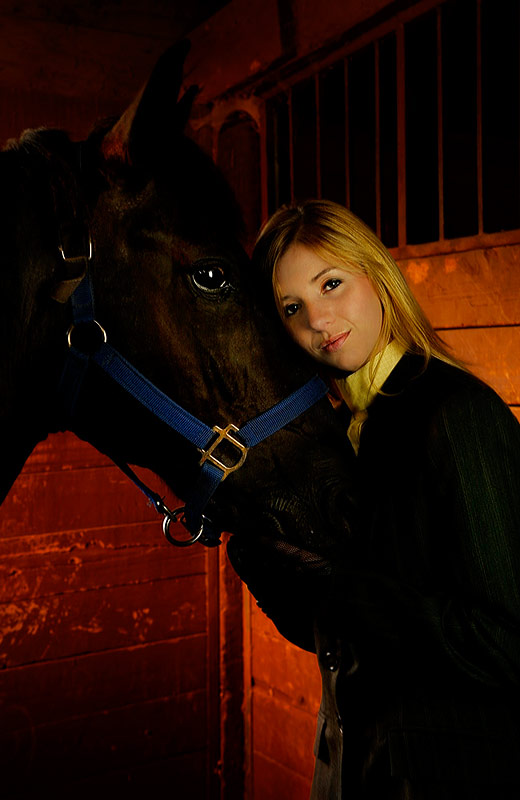 Final Exam: session 1 Image #7 … Champion Companions … With three days complete our class had done it all, Lightpainting on Day 1, Small Off Camera Flash on Day 2, and Larger Strobes/Bigger Location on Day 3. They had watched presentations, heard lectures, witnessed demonstrations, experienced hands on learning, made some images and I think learned and enjoyed the class thus far. This day, Day 4, would be different. Today the class of 20 would team up into 10 groups of two students each. Each pair of students would work together and could use any of the equipment (Lightpainting, Nikon SB900 Speedlights, Elinchrom Rangers, Bogen Lightstands, Softboxes, Grids, Gels etc, etc, etc,) to produce their own images. Our first location was a horse farm where, back by popular demand, was Desiree, our Day 1 Lightpainting model. Desiree is a championship equestrian rider. She and her horse Panda graciously modeled for the first of two final exam photo shoots. Each student-duo was given 10 minutes to set up lighting gear using whatever equipment or combination of equipment they felt would make the image they wanted. Benny, Dana Harris, Kevin, and Mark Astmann the product manager from Bogen, would help assemble gear and assist the groups during this first shoot. Desiree and Panda were very patient during this morning session as each pair of photographers took their turn selecting equipment, managing the assistants, positioning the lights, and finally making some pictures. I could not have been happier with the results. Some beautiful portraits, nicely lit, on location, and no one stepped in any ….. well, anything. An egg timer helped count the minutes and as it ticked away the two students on the clock would collaborate, recall the previous 3 days of instruction and experience, and then set up lights and shoot. When all the groups had finished and the gear was being packed up, I took a few frames of my own and made this portrait of Desiree and Panda using a Nikon D3, ISO200, 1/25 at f5.6, Nikon 24-70mm lens, WB 6250K, Two Nikon SB900 Speedlights in i-TTL and Remote mode off camera flashes, One SB900 with my Chimera Softbox set-up held by a student just out of the right side of the frame with a power output of -2.0, and one SB900 with warming gel and a power output of -2.0 held by a student 10 feet to my left and behind Panda to illuminate the barn wall with warm light, Nikon SU800 Commander to trigger the remote SB900 Speedlights, Lexar 8G Flash Card. Final Exam: session 1 Image #7 … Champion Companions … With three days complete our class had done it all, Lightpainting on Day 1, Small Off Camera Flash on Day 2, and Larger Strobes/Bigger Location on Day 3. They had watched presentations, heard lectures, witnessed demonstrations, experienced hands on learning, made some images and I think learned and enjoyed the class thus far. This day, Day 4, would be different. Today the class of 20 would team up into 10 groups of two students each. Each pair of students would work together and could use any of the equipment (Lightpainting, Nikon SB900 Speedlights, Elinchrom Rangers, Bogen Lightstands, Softboxes, Grids, Gels etc, etc, etc,) to produce their own images. Our first location was a horse farm where, back by popular demand, was Desiree, our Day 1 Lightpainting model. Desiree is a championship equestrian rider. She and her horse Panda graciously modeled for the first of two final exam photo shoots. Each student-duo was given 10 minutes to set up lighting gear using whatever equipment or combination of equipment they felt would make the image they wanted. Benny, Dana Harris, Kevin, and Mark Astmann the product manager from Bogen, would help assemble gear and assist the groups during this first shoot. Desiree and Panda were very patient during this morning session as each pair of photographers took their turn selecting equipment, managing the assistants, positioning the lights, and finally making some pictures. I could not have been happier with the results. Some beautiful portraits, nicely lit, on location, and no one stepped in any ….. well, anything. An egg timer helped count the minutes and as it ticked away the two students on the clock would collaborate, recall the previous 3 days of instruction and experience, and then set up lights and shoot. When all the groups had finished and the gear was being packed up, I took a few frames of my own and made this portrait of Desiree and Panda using a Nikon D3, ISO200, 1/25 at f5.6, Nikon 24-70mm lens, WB 6250K, Two Nikon SB900 Speedlights in i-TTL and Remote mode off camera flashes, One SB900 with my Chimera Softbox set-up held by a student just out of the right side of the frame with a power output of -2.0, and one SB900 with warming gel and a power output of -2.0 held by a student 10 feet to my left and behind Panda to illuminate the barn wall with warm light, Nikon SU800 Commander to trigger the remote SB900 Speedlights, Lexar 8G Flash Card. |
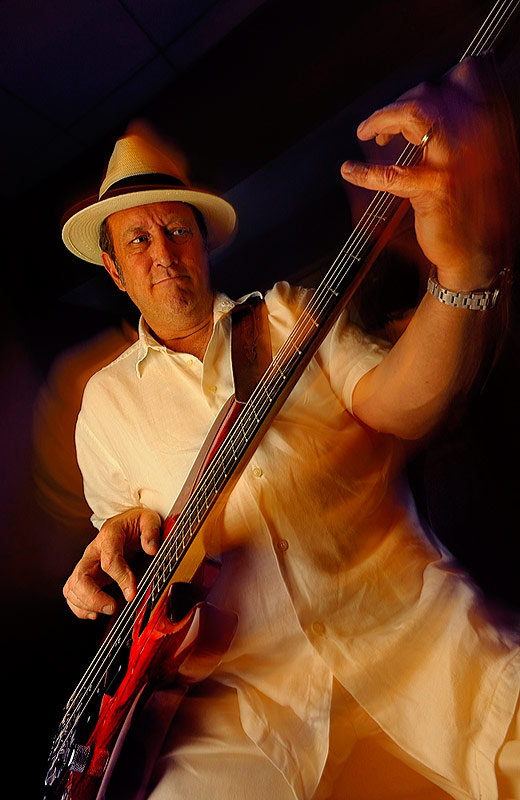 Final Exam: session 2 Image #8 … Peter Black Rocks … After lunch the class gathered in the Sheraton Hotel lounge for the second session of their Final Exam. Unlike the barn area which was too bright for Lightpainting, the hotel lounge was suitable for every form of lighting the class had been taught including Lightpainting. Our Final session was a Jazz Guitarist dressed to perform in a Night Club. When we walked into the lounge, there was Peter Black, no relation to me, a Jazz Guitarist dressed in all white with a fiery red guitar. We cleared the staging area, prepared the equipment, and made ready any props, chairs, instrument cases, etc. The class knew what to do and paired up into their 10 groups of two. All was ready so I set the egg timer at 10 minutes and then Benny, Dana, Kevin, Mark and myself watched as each pair set up lights, posed the subject, and made pictures. As the timer ran out on each dynamic duo of photographers I would review their images and then watch the next group spring into action. The class produced many good pictures using Speedlights, Rangers, Lightpainting, and a few even combined Strobes and Lightpainting for some great imagery. Everyone produced interesting pictures and deserved the highest of marks. While one of the groups was preparing the lights I stepped in and made a picture of Peter too. Nikon D3, ISO800, 1/6 at f20, Nikon 24-70mm lens, WB 3700K, One SB900 Speedlight i-TTL, Remote mode with warming gel and my small Chimera Softbox rig held in my left hand and a power output +0.7, Lexar 8G Flash Card. I used a slow shutter speed of 1/6 so I could move the camera slightly while making the picture of Peter playing the guitar. This slow shutter speed gave a soft ghosting to Peters body and to his left hand as he worked his fingers up and down the guitar neck. The hand held SB900 with warming gel and softbox is easy to hold and move with me as I worked around Peter. Final Exam: session 2 Image #8 … Peter Black Rocks … After lunch the class gathered in the Sheraton Hotel lounge for the second session of their Final Exam. Unlike the barn area which was too bright for Lightpainting, the hotel lounge was suitable for every form of lighting the class had been taught including Lightpainting. Our Final session was a Jazz Guitarist dressed to perform in a Night Club. When we walked into the lounge, there was Peter Black, no relation to me, a Jazz Guitarist dressed in all white with a fiery red guitar. We cleared the staging area, prepared the equipment, and made ready any props, chairs, instrument cases, etc. The class knew what to do and paired up into their 10 groups of two. All was ready so I set the egg timer at 10 minutes and then Benny, Dana, Kevin, Mark and myself watched as each pair set up lights, posed the subject, and made pictures. As the timer ran out on each dynamic duo of photographers I would review their images and then watch the next group spring into action. The class produced many good pictures using Speedlights, Rangers, Lightpainting, and a few even combined Strobes and Lightpainting for some great imagery. Everyone produced interesting pictures and deserved the highest of marks. While one of the groups was preparing the lights I stepped in and made a picture of Peter too. Nikon D3, ISO800, 1/6 at f20, Nikon 24-70mm lens, WB 3700K, One SB900 Speedlight i-TTL, Remote mode with warming gel and my small Chimera Softbox rig held in my left hand and a power output +0.7, Lexar 8G Flash Card. I used a slow shutter speed of 1/6 so I could move the camera slightly while making the picture of Peter playing the guitar. This slow shutter speed gave a soft ghosting to Peters body and to his left hand as he worked his fingers up and down the guitar neck. The hand held SB900 with warming gel and softbox is easy to hold and move with me as I worked around Peter. |
I could not have been happier with the class performance throughout the 4 days. Together we learned a lot about lighting and how to use it. By only lighting part of the picture we produced some very interesting images. Eight photo shoots in four days, how was it possible? Several weeks earlier I had given Benny a request list of models and locations for our class … Flower Arrangement, Lovely Lady in a Red Dress who could hold still for Lightpainting, Tattoo Artist or Rock Star, Body Builder, Ballerina and Ballet Studio, Boxer and Boxing Gym, Jazz Musician, and a Model and Location of Benny’s choice (Desiree and Panda). He found them all and arranged for all the locations. Thanks to Benny for making each day of class a great success. Thanks also to Dana Harris, a very talented photographer in his own right who took time off from his shooting schedule to work with all of us and help make the class run smoothly. And a special thanks to Kevin Lackey and Mark Astmann from Bogen Imaging for providing the Elinchrom and Bogen equipment, and for assisting our class with technical expertise and some additional muscle.
Well, there are many Workshop at the Ranch articles that I have devoted to lighting. Lightpainting, Speedlights, and larger Strobes are all tools and techniques of my craft. I encourage you all to investigate lighting by reading some of my other articles to learn about and understand why I believe that Light is the Greatest Influence.
See you next time here on Workshop at the Ranch.
Adios. Dave
