Workshop at the Ranch – December 2004 – Step-by-Step Lightpainting
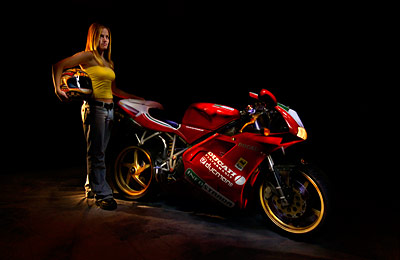
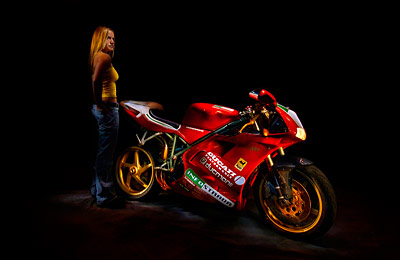
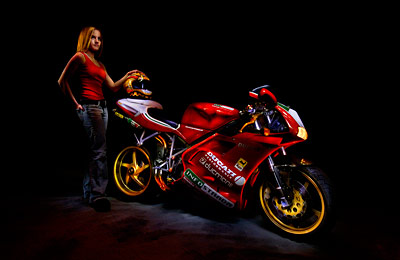
![]() Hi again, and welcome to the December issue of Workshop At The Ranch. I thought it might be fun to recap a seminar I taught during the Sports Shooter Workshop and Luau that I taught at while on the road. My breakout session was Lightpaintng. Some165 students signed up for the 2 sessions but over 200 total managed to find space on the walls and floor to see the SHOW. Before class began I made a few practice images of Jess and the Ducati Super Bike 916. Here are three test images I made before class started that might help illustrate the evolution of a lightpainting.
Hi again, and welcome to the December issue of Workshop At The Ranch. I thought it might be fun to recap a seminar I taught during the Sports Shooter Workshop and Luau that I taught at while on the road. My breakout session was Lightpaintng. Some165 students signed up for the 2 sessions but over 200 total managed to find space on the walls and floor to see the SHOW. Before class began I made a few practice images of Jess and the Ducati Super Bike 916. Here are three test images I made before class started that might help illustrate the evolution of a lightpainting.
Hi again, and welcome to the December issue of Workshop At The Ranch. I thought it might be fun to recap a seminar I taught during the Sports Shooter Workshop and Luau that I taught at while on the road. My breakout session was Lightpaintng. Some165 students signed up for the 2 sessions but over 200 total managed to find space on the walls and floor to see the SHOW. Before class began I made a few practice images of Jess and the Ducati Super Bike 916. Here are three test images I made before class started that might help illustrate the evolution of a lightpainting.
First, let’s review just how the lightpainting is executed…..
Camera and settings: Nikon D2H, manual focus, ISO 200, Noise Reduction Mode ON, Shutter: BULB, Nikon MC-20 cable release set at 1 minute and 15 seconds, Self Timer Mode at 10 seconds………Lens: Nikon 12mm-24mm, f16. I used a Bogen Tripod with a ball head.
Light source: 5 LED bulb flashlight from the Sharper Image…..about$25. With about 1 inch of black gaffer’s tape extending off the front to create a snoot effect. The LEDs are daylight balanced, approx.: 5300K.
The scene: I used black cloth as a background and a gray painted backdrop on the floor to resemble a garage floor (the hotel carpet was not appropriate.)
Subject: The always cheerful and lovely Jess, and a Ducati Super Bike 916.
The Process: Lightpainting is executed in a dark environment and long exposure where the photographer illuminates only the areas of the scene they want to reveal during the long exposure time. With the room lights turned on I must pre-focus on my subject manually so that the auto-focus is not actively working during the long exposure in the darkened room. A Nikon electronic cable release (MC-20) is used to achieve a longer than 30 second exposure (in this case 1 minute and 15 seconds.) Noise Reduction Mode is turned ON to eliminate long exposure noise that can appear during long exposures of 5 seconds or more. The tripod is to prevent camera movement. The self timer is set at 10 seconds so that I have 10 seconds to 1.walk into the scene (wearing dark clothing) and 2.be ready to lightpaint when the shutter is released. My subjects (Jess and the Super Bike) must remain motionless during the time they are being painted with light from the flashlight. Any movement will cause blurring……however, during time when no light is on your subject, they could have movement and not be recorded in the image. I must first set my exposure to capture a BLACK IMAGE, (this can be difficult windows, doors and even your computer can leak unwanted light into a room that appears to be dark)…..ex: Our classroom needed an exposure of ISO200, f16 at 1 minute 15 seconds to capture a black image where neither Jess, the bike or me walking around the subjects would be visible. I chose 1 minute and 15 seconds (from past experience with set ups of this size) as a time required to paint both Jess and the intricacies of the super bike.
So…
1. pick an exposure time you think will give you enough time to paint your subjects
2. pick an aperture and take a test shot while the room is darkened…..
3. then look at the image on the LCD screen. The image should be black, dark, empty, nothing visible. Think of it as a dark frame with no light… an empty canvas with no paint. Now you are ready to lightpaint. When you add the light from your flashlight during the long exposure to your subject, then you are painting like an artist with a brush. How much light you paint with depends on intensity of your light and distance your light is from the subject. It is all up to you now. With a set up this size I like to paint close…..aprox: 12 – 24 inches away. I continually move the flashlight while painting so as not to have hot spots (burned area of too much light) on my subjects. This technique requires lots of practice, trial and error and patience. It might require 20-30 attempts where your timing, distance, intensity and creativity of lightpainting “brush”strokes all come together to create one great image.
I hope you have enjoyed this “evolution of a lightpainting” and the technique by which to capture a unique and stylized image that strobes can not produce. This is a very trial and error process. There are few guidelines with the exception of having a dark room and enough time to paint. I advise lots of experimentation. Use different lights, gels, snoots, etc to create the look you like. I would like to thank Jess for doing a terrific job of modeling and my college teammate Glenn and his buddy Tom for bringing in the Super Bike. For additional lightpaintings and examples you might look at past issues of On the Road and Workshop at the Ranch.
Also, If you do not have a digital camera with a Noise Reduction Mode, try this to help eliminate the long exposure noise associated with long exposures….
After you have made a lightpainting frame,
1. Cover the lens with the lens cap and take another frame with the same exposure settings.
2. Bring both the “lightpainting image” and the “blank frame”(the one with the lens cap on) into Photoshop and activate the lightpainting image.
3. click Image to drop the Image box………….Then, click Apply Image,
4. Drop the Source Box and highlight the “blank frame”
5. The Layer box will read Background
6. The Target: will read “lightpainting image”
7. Drop the blending box and click Subtract…….approx: 85% of the noise should now be subtracted out.
This photoshop procedure works to a degree but is not perfect. Cameras with Noise Reduction Modes are the best solution. This procedure is for long exposure noise, NOT high ISO noise.
Well,…… have fun with lightpainting and I will see you all next year Workshop At The Ranch. Adios, Dave


