Workshop at the Ranch – October 2007 – Football…a Retro Look
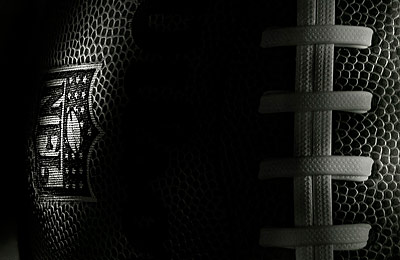
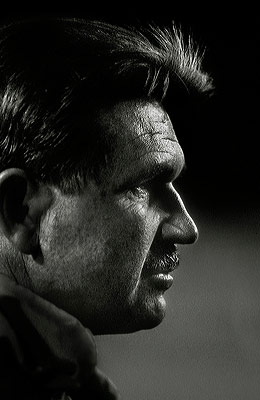
![]() Hi and welcome to this edition of Workshop at the Ranch. During the course of each year I give a number of presentations, lectures and teachings at workshops across the country. I usually give a digital picture show at these events that include a variety of my work ranging from career images and highlights to instructional lecture demonstrations. I’m always looking to inform and entertain and so I’m always looking for a new way to display my work on the big screen. These images are Black and White conversions. I’m just old enough to have slipped past the era of B&W football photography but marvel at the monochromatic images of grid iron history printed in Black and White.
Hi and welcome to this edition of Workshop at the Ranch. During the course of each year I give a number of presentations, lectures and teachings at workshops across the country. I usually give a digital picture show at these events that include a variety of my work ranging from career images and highlights to instructional lecture demonstrations. I’m always looking to inform and entertain and so I’m always looking for a new way to display my work on the big screen. These images are Black and White conversions. I’m just old enough to have slipped past the era of B&W football photography but marvel at the monochromatic images of grid iron history printed in Black and White.
Hi and welcome to this edition of Workshop at the Ranch. During the course of each year I give a number of presentations, lectures and teachings at workshops across the country. I usually give a digital picture show at these events that include a variety of my work ranging from career images and highlights to instructional lecture demonstrations. I’m always looking to inform and entertain and so I’m always looking for a new way to display my work on the big screen. These images are Black and White conversions. I’m just old enough to have slipped past the era of B&W football photography but marvel at the monochromatic images of grid iron history printed in Black and White.
These conversions where done in Photoshop. Post processing in Photoshop is a topic I have not addressed in any prior articles of Workshop at the Ranch. The reason is simple …… it’s too complex. Better said, trying to teach Photoshop post processing is an endless trail of roads that seem to arrive at the same results. Fore the most part, I leave the complexity of teaching of Photoshop to the experts and prefer to keep it simple on my end.
My B&W conversion is rather simple. I know, I know, there are many ways to do this …. probably much better than mine, but the comments I have received from the B&W football show I have given at various schools and workshops has given me some confidence to share what some have said is the “best Black and White images” they have ever seen. Thanks Robert Seal.
First of all, why convert color images to Black & White in the first place. Well, I wanted a little variety in my presentation but also wanted each image to stand alone with no help from color, neither Kodak or Fuji to help make a football statement. B&W images sink or swim based on content alone. Sometimes it is the color within an image that draws attention and not the content and composition. To view your images in B&W is a true test of photography. It will be an eye opener to many of you.
All these image were originally photographed in color. Some are film and some are digital. I keep the conversion formula the same. After opening up your image in Photoshop ( I have CS2 ) I “click” Image, then I place the curser over Adjustments, this opens a long list of applications that can be made to your picture. If you look down the list you will see Channel Mixer, “click” Channel Mixer and the Channel Mixer box opens up. At the bottom left corner of the box is the word Monochrome. “Click” the small box next to Monochrome and the picture becomes Black and White. Simple, … no applause please. This is the obvious part and according to “the Experts” is a very clean and non pixel damaging way to make B&W, but if you study the prints of the great masters of Black and White you will see tone quality that clicking monochrome doesn’t have. My observations lead me to add some color to my monochromatic picture so as to better achieve a minds image of “classic Black and White.” So, let’s continue … “click” OK which closes out the Channel Mixer box. Now “click” Image and place the curser over Adjustments and there is the long list of applications again. “click” Color Balance and the Color Balance box appears. The Midtones box is usually checked already by default so start there and slde the Magenta———Green slider to the right +1. The middle Color Levels box at the top will indicate +1. Now slide the Yellow———Blue slider to the left -1. The right Color Levels box will indicate -1. You have just added a slight green/yellow tone to the midtone areas of the picture. Now check the Highlights box and slide the Magenta———Green slider the the right +1 and the Yellow———Blue slider the the left -1. The highlights of the picture now have a slight green/yellow tone. Leave the Shadows alone and “click” OK to close out the Color Balance box. Now comes the personal choice that only you can make. How black do you want the Shadow areas of the picture. I like dark shadows so I “click” Image, place the curser over adjustments to reveal the list of applications then I “click” on Selective Color and the Selective Color box appears. See the word Method:, check the Absolute box. See the word Colors:, “click” the drop box arrow and “click” Blacks. See the word Black:, slide the Black slider to the right. Notice that the shadow areas of the picture begin to get darker the more to the right you move the slider. I like +3. “click” OK and close out the Selective Color box and your B&W conversion is done. I might also suggest that you create an “ACTION” for your B&W conversion. This way you can make a key stroke on your computer that converts the image to B&W by simply pressing the key you designate for this action.
The addition of the green/yellow color tone to the monochromatic picture is a subtle application but so effective in replicating a historical Black and White look and feel to an image. The key stoke action to impliment the conversion makes it quick and easy.
Here are a few examples from my NFL library of images that have been converted to Black and White using the B&W conversion formula taught in this edition of Workshop at the Ranch..
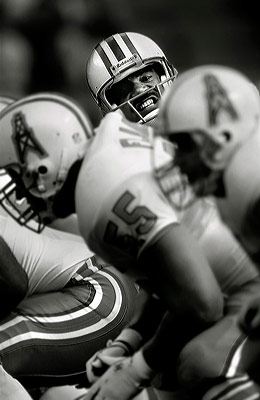 Image #3 Moon Rising … Warren Moon, quarter back of the Houston Oilers. It’s a simple picture but I have always liked the intense signal calling from Moon as he appears to rise above the offensive line.
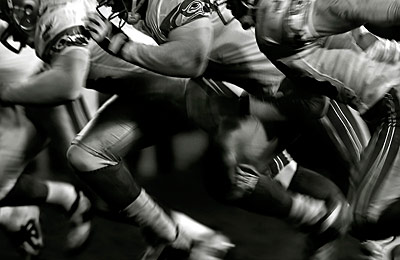 Image #4 Sea Hawks in Flight … Seattle linemen rushing to block a punt. I like shooting football at a slow shutter speed to give some sense of motion to the players.
![]()
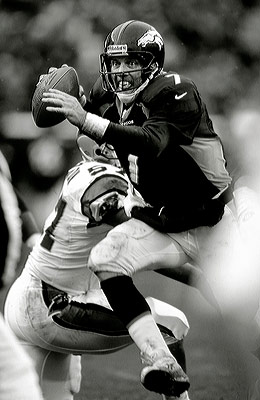 Image #5 John Elway … Elway’s rookie start was my first ever live football game. It was shot for Sports Illustrated in 1983 and triggered several years of football coverage for me with SI. I followed John for his entire career and must admit football in Denver has not been as thrilling since his retirement.
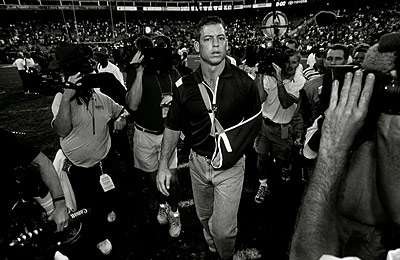 Image #6 Troy Aikman … A shoulder injury to Aikman seemed non threatening but he never took the hits after he recovered. This is probably a more journalistic picture than one might think as it may have been the beginning of the end for Aikman.
![]()
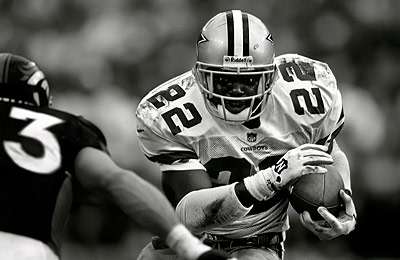 Image #7 Emmit Smith … One of the greatest running backs ever and now a champion ballroom dancer … who would have guessed.
![]()
 Image #8 Rainy defeat for a Washington Redskin’s player… Slow shutter speed, rear curtain sync and an SB800 Speedlight held off camera. This is a favorite technique I use at the end of many games while players are running off the field.
![]()
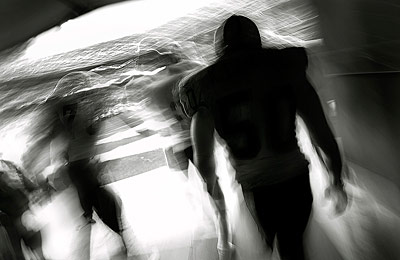 Image #9 Taking the Field … Pittsburg Steelers leaving the tunnel.
![]()
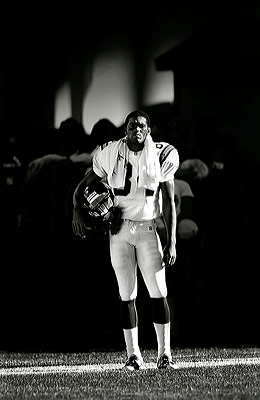 Image #10 Randy Moss … A very young Randy Moss stands distant from his Viking teammates during the National Anthem.
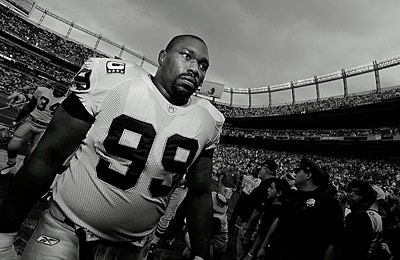 Image #11 Warren Sapp … Warren Sapp leaves Invesco Field at Mile High Stadium after a crushing overtime loss to the Denver Broncos.
 Some old images and some new images all with a very retro look of Black and White. There are numerous conversion formulas to achieve Black and White images in Photoshop. What I do is my own and it seems to work well. My hope is that it might be helpful to those who enjoy the days of B&W prints.
See you next time on Workshop at the Ranch. Adios, Dave


